Ceramic coating high spots: how long to fix them?
A high spot on a freshly coated panel announces itself in the most disorienting way: a streak that catches the light wrong, a rainbow shimmer where the applicator sat a fraction of a second too long…
Judson Grier·Updated: August 13, 2026·20 min read
Ceramic Coating High Spots: How Long Do You Have to Fix Them?
A high spot on a freshly coated panel announces itself in the most disorienting way: a streak that catches the light wrong, a rainbow shimmer where the applicator sat a fraction of a second too long, a patch of gloss that refuses to level no matter how often you wipe it. The clock starts the moment excess product touches the paint, and that clock is short.
Ceramic coatings do not extend you the courtesy of “I’ll fix that tomorrow.” They cross-link on their own schedule, and what you can wipe flat with a microfiber at minute three may become a polishing job later the same day. Exactly when that change happens depends on the coating, the panel temperature, humidity, product thickness, and the instructions supplied by the manufacturer.
That is the physical reality of ceramic installation work. The chemistry waits for no one, and the same product that forgives a clumsy pass in cool conditions can become brittle and unforgiving when the panel warms up. The ceramic coating high spots removal window is not a universal number printed into every bottle. It is a moving period of workability that narrows as the coating flashes and cures.
Identifying High Spots: Visual Cues and Environmental Factors
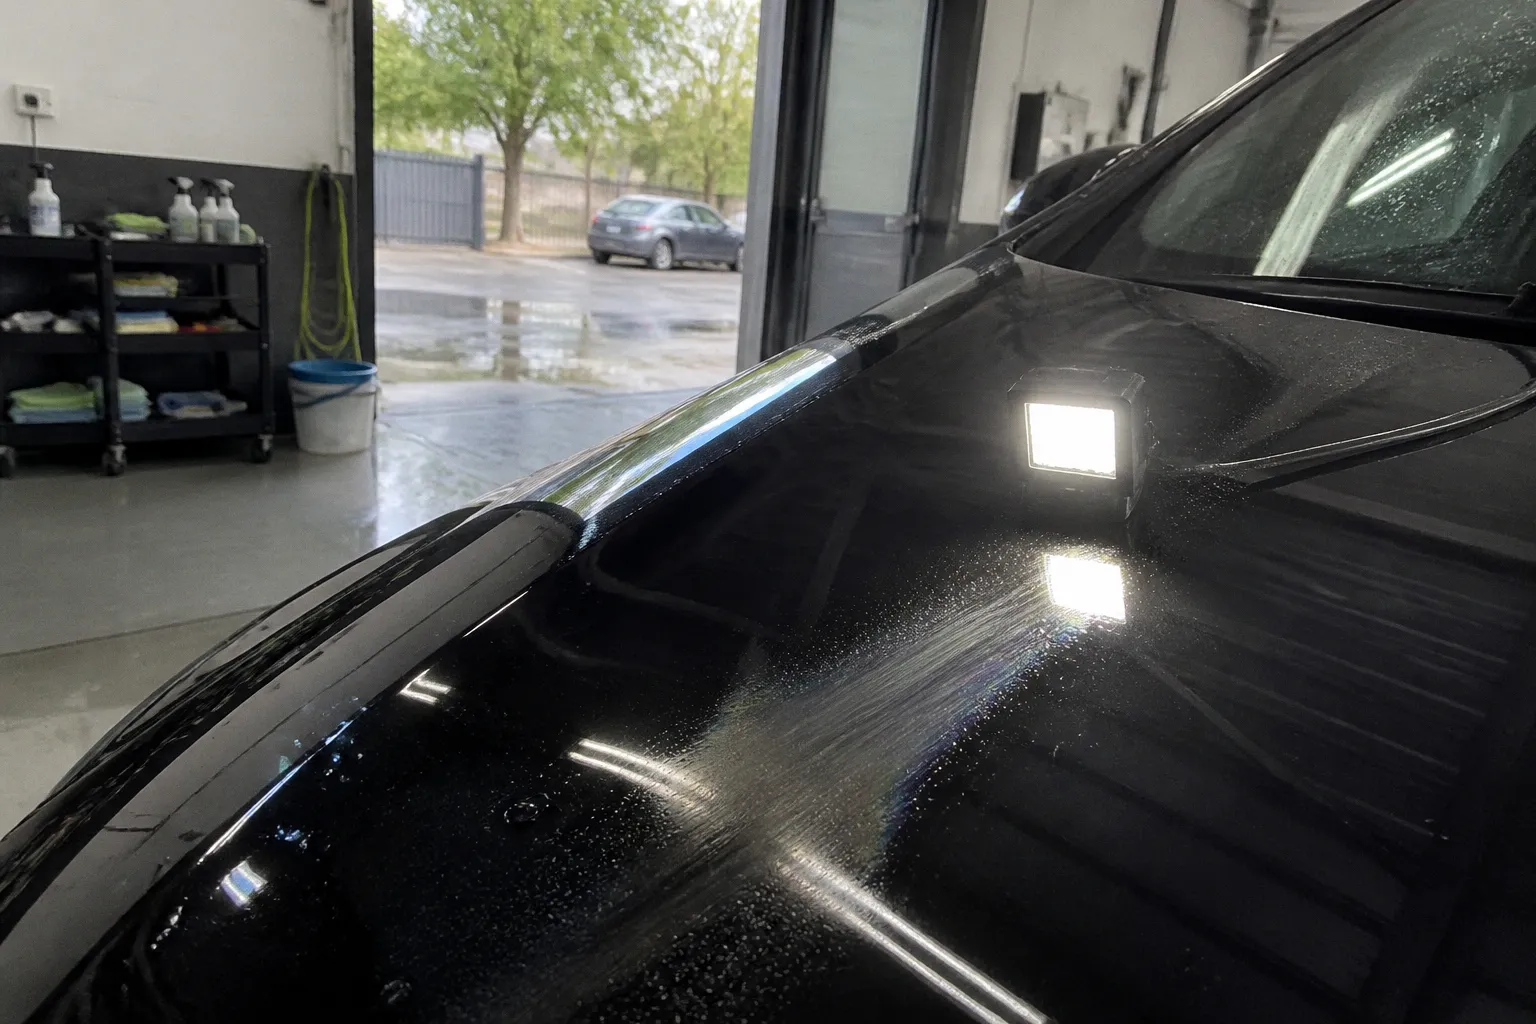
High spots are physical objects. They are extra material sitting on top of the curing layer, refracting light differently from the surrounding coating. On dark paint — black, dark blue, deep green — they announce themselves immediately: dark streaks, smudges that will not buff out with a follow-up pass, or a glossy patch surrounded by the more uniform sheen of a properly leveled coating.
You often see them as soon as the coating flashes, because the eye knows what a consistent surface should look like. The problem is that “as soon as it flashes” does not mean the same thing for every product. Some coatings remain visibly wet longer, while fast-curing professional formulas can become difficult to move before an inexperienced installer expects. The bottle’s application notes, not a generic timer, should control the first decision.
On light paint — white, silver, pale gray, and the warm beige tones that dominate so many SUV hoods — high spots hide. They register as faint rainbow hazes under direct sun or a strong work light, the kind of artifact you only see when you squat down and rake a beam across the panel at a low angle. We have seen detailers finish an entire light-colored car, walk away satisfied, and then spot a half dozen high spots when they pull it into afternoon sunlight for delivery. The shop lighting lied to them. The chemistry did not.
Move the light rather than relying on one inspection angle. A high spot may disappear when viewed straight on and reappear when the beam travels across the panel. Check the center of the section, the overlap between application passes, and the areas where the coating may have pooled:
- Along body lines and sharp creases, where the applicator changes direction.
- At the edge of a panel, where product can collect against tape or trim.
- In concave sections, around emblems, and beside handles.
- Near the lower edge of a door, where gravity can pull a wet film downward.
- At the beginning and end of a wipe, where pressure and product distribution can change.
A high spot is not always a dramatic dark stripe. Sometimes it is a slightly different reflection, a patch that looks wetter than the surrounding paint, or a subtle texture that becomes obvious only after the rest of the panel has cured.
A high spot does not appear when the coating fails. It appears when more material was left behind than the surface could hold evenly — and how long you have to correct it depends on the product, the panel, and the conditions around the car.
Temperature is one of the variables that most quickly changes the working time. A coating that gives you several minutes in a cool garage may flash far sooner on a warm panel. A hood that has been sitting in the sun carries heat into the work even after the car rolls into a cooler shop. Ambient temperature matters, but substrate temperature can matter just as much.
Humidity also changes the feel of the application. Depending on the formulation, higher humidity can alter solvent evaporation and curing behavior. That does not mean there is a simple rule such as “high humidity always slows the coating” or “low humidity always makes it flash faster.” It means the same product can behave differently from one day to the next, which is why experienced installers make a small test section when conditions are unfamiliar.
Step one, then, is environmental awareness before the applicator ever touches the panel. If you are working in a warm shop, you move faster, use less product per pass, and inspect every section with a bright light. If you are working outside or in cool weather, you may have more working time, but the coating may also take longer to level and cure. Neither condition removes the need to watch the film. It only changes how quickly you need to respond.
Reading the flashing stage
“Flashing” is the point at which the coating begins changing from a visibly wet film into a hazier or rainbow-like surface as the carrier solvents evaporate. That visual cue is useful, but it is not a universal signal. Some coatings flash clearly; others remain deceptively clear. Some manufacturers recommend leveling as soon as a particular haze appears, while others specify a time range or a tactile check.
The goal is not to wait for the most dramatic rainbow effect. By then, the excess may already be more difficult to remove. Apply the product in a section small enough to monitor, observe how that product changes under the current conditions, and adjust your wipe timing accordingly. If the coating begins to drag, smear, or resist a light towel pass, stop adding pressure and reassess. Pressure is not a substitute for correct timing.
The Immediate Fix: Leveling During the Flash Window
For many consumer-grade ceramic coatings, the active leveling period is measured in minutes after the product touches the panel. The exact period may be shorter or longer, and fast-curing professional products can close it sooner than a general guide would suggest. During the workable part of that period, the carrier solvents have evaporated enough for the film to begin setting, but the silica network has not yet become resistant to movement.
This is the easiest point at which to correct a high spot. A light pass with a clean, short-nap microfiber towel can shear the excess flat. Follow with a second clean towel or a fresh side of the first towel to remove residue. Use little or no pressure. You are not trying to scrub the paint; you are redistributing and removing surplus coating before it locks itself into place.
The technique is simple, but the timing is not. The mistake people make in this window is over-buffing: pressing hard, working the area in tight circles, or generating friction heat through the towel. That heat can accelerate the flash on the spot you are trying to fix and turn a recoverable high spot into a much more stubborn one. We have watched installers ruin perfectly recoverable panels by trying too hard.
Use towels with a nap that gives you control without dragging. A towel saturated with coating can spread the problem instead of removing it, so fold it to a clean section frequently and replace it when it becomes loaded. Keep a second towel available for the final leveling pass. If the surface starts to smear rather than clear, do not keep polishing the same mark indefinitely. Change the towel, check the product instructions, and decide whether the coating is still in its intended wipe-off phase.
The flash window also closes unevenly across the panel. Edges, body lines, and concave areas — anywhere the coating puddles — may remain wetter or may behave differently from a broad, flat section. A hood coated in two passes can have a center section that has already started curing while the leading edge is still movable. This is why we work in small sections: half a hood, a fender, or a door, depending on the product and conditions.
The correct discipline is to inspect each section with a light before moving on. We do not trust ourselves to catch everything at the end of the installation. We check as we go, then inspect the whole vehicle again after the coating has had time to settle under the actual shop lighting and, when practical, under natural light.
If you spot a high spot while the coating is still within its manufacturer-specified leveling period, level it. Do not talk yourself out of it. Do not wait to see if it settles. A coating can continue to change in appearance as it cures, but an obvious excess film should not be expected to level itself just because more time passes.
A practical first response
When the mark is fresh, the sequence is usually:
1. Confirm that it is excess coating rather than dust, towel lint, or a defect in the paint.
2. Use a clean microfiber and a light, controlled pass across the mark.
3. Wipe the surrounding area with a fresh towel section so the residue is not left as a second haze.
4. Inspect from several angles under a strong light.
5. Recheck the section after a short interval, because a thin remaining ridge can become more visible as the surrounding film dries.
If the product’s instructions specify a different wipe method, solvent, or timing, those instructions take priority. The material on the panel is not generic “ceramic.” It is a particular formulation with its own solvent package and cure behavior.
The Extended Window: Re-Emulsification After a Partial Cure
Missing the initial flash window does not always mean the panel is immediately lost. Depending on the coating, some partially cured high spots can still be softened and leveled with fresh product. This is the stage often described as re-emulsification: a small amount of the same coating is used to make the existing excess workable again before it has fully cross-linked.
There is no universal twelve-hour guarantee here. Some coatings may remain responsive for several hours, and certain manufacturers may describe a workable period of up to about twelve hours. Others, particularly fast-curing professional products, may close that option sooner. Earlier correction is more reliable, and the product’s technical instructions should control both the timing and the method.
If the manufacturer allows this type of correction, the procedure is usually conservative. Place a very small amount of fresh coating over the high spot — often one or two drops is enough for a localized mark — and level it immediately with a clean microfiber. The fresh product can soften the partially cured material beneath it, allowing the excess to merge and be wiped flat.
That description matters: this is not a guaranteed rescue technique. It works only while the original film remains chemically responsive, and that point varies with the coating and conditions. A product applied heavily in a warm, dry environment may be much less forgiving than the same product applied in a cool, controlled shop. A spot noticed two hours after application may be easy to re-emulsify with one coating and already resistant with another.
A twelve-hour period can be an outer possibility for some coatings, not a universal deadline or a target. The earlier a high spot is found, the better the odds of re-emulsification; the manufacturer’s instructions decide whether that method is appropriate.
Before adding fresh product, read the label and consider the age and appearance of the mark. If the spot is still visibly wet or lightly tacky, the ordinary leveling method may be enough. If it has become hard, glassy, or resistant to a gentle towel pass, adding more coating may only increase the amount of material that eventually needs to be polished away.
Do not flood the area. More product does not create a larger margin for error. It can create a thicker patch and make the subsequent correction more difficult. Use the smallest amount that the manufacturer recommends, work immediately, and inspect carefully. If the surface does not respond with light pressure, stop rather than forcing it.
There is also a difference between a partially cured high spot and a cured ridge that merely looks wet under the light. The former may soften when fresh product is introduced. The latter will not become workable simply because it has been covered with another layer. The distinction is not always obvious, which is another reason to avoid experimenting with large amounts of coating.
The phrase “up to twelve hours” should therefore be read as a product-dependent possibility, not a stopwatch that applies to every installation. Earlier is safer. A fast formula can become difficult well before that point, while another coating may remain responsive somewhat longer. If the instructions do not describe re-emulsification, the conservative choice is to contact the manufacturer or plan for mechanical correction rather than assume the technique will work.
Mechanical Correction: Addressing Fully Cured High Spots
Once the coating has cured beyond its workable chemical stage, wiping will not move the high spot. Fresh product will not reliably dissolve it. Household chemicals — vinegar, weak isopropyl alcohol, and the home remedies often recommended in detailing threads — are not dependable ways to remove a cured ceramic ridge. They may strip residue, affect the surrounding surface, or dull the finish without actually leveling the excess.
At this point, the work changes character. You are no longer fixing a chemistry problem. You are doing paint correction.
A dual-action polisher, a soft foam finishing pad, and a suitable fine polish are the normal starting tools. The pad abrades the cured high spot gradually, leveling the excess while limiting the amount of surrounding coating removed. Light pressure, low to moderate speed, and controlled passes give you more useful information than an aggressive compound used in a hurry.
The technique matters more than the apparent toughness of the mark. We work the spot with a fresh pad if possible, because a used pad can carry spent polish and abraded coating material that increases the chance of hazing or reintroducing residue into the area. Start with a finishing polish and a soft pad. Escalate only if the high spot resists, and clean the panel between attempts so you can see what has actually changed.
The objective is not to make the coating disappear from the whole panel. It is to reduce the raised area until the reflection is uniform. That usually means sacrificing some of the surrounding coating, because the polisher cannot abrade only the highest molecules with perfect precision. Keep the working area tight, but not so small that you create a sharp transition in gloss.
For a small, recently cured mark, a finishing polish may be enough. A larger or older high spot may require a more corrective foam pad and a stronger polish. The correct combination depends on the hardness of the clear coat, the hardness and thickness of the cured coating, the size of the defect, and the finish you need to restore afterward.
High spots that have been left for weeks or months — the kind that show up after a customer takes delivery, lives with the car for a week, and then points at a rainbow streak under showroom lights — can require more involved correction. Medium-cut foam pads may enter the picture. In stubborn cases, particularly on hard clear coats, wet sanding with fine finishing paper can be considered, followed by progressive polishing to restore gloss.
Wet sanding is not a casual next step. It is a controlled removal process, and the margin for error is smaller than many owners realize. Every pass removes some combination of cured coating and clear coat. Clear coat does not grow back. If the defect is large, the panel is valuable, or the installer is not comfortable measuring and controlling paint removal, professional correction is the sensible choice.
A cured high spot is not a stain waiting for the right household solvent. It is a raised film that must be leveled mechanically, and every aggressive step increases the amount of surrounding coating — and potentially clear coat — placed at risk.
The honest move at this stage is to recognize what you are doing. You are not “removing ceramic coating” as a perfectly isolated task. You are abrading the top of the coating until the high spot is level with the surrounding surface. The surrounding coating will be thinned by the work. If the correction reaches the clear coat, that clear coat will also be marginally closer to its safe limit in that section.
That does not mean every cured high spot requires a dramatic repair. It means the repair should be approached as paint correction rather than as a cleaning problem. Test the least aggressive method first, inspect the result, and only then decide whether more correction is justified.
When the defect is not worth chasing
There are cases where a faint high spot is visible only under one harsh inspection light and the attempt to make it absolutely invisible would remove more material than the defect warrants. This is particularly relevant on thin or previously corrected paint. A professional may choose to reduce the visual impact rather than chase the last trace of a mark.
That decision is not laziness. It is part of responsible correction. A coating is replaceable. Clear coat is not. The right finish is the one that balances appearance, protection, and the remaining condition of the paint.
Restoring Protection After Polishing and Leveling
Once you have polished out a cured high spot, treat the corrected area as though its original protection has been compromised. Some of the initial film may remain in a thinned state, but you cannot assume it offers the same protection as the untouched surrounding coating. The usual next step is to remove polishing oils and residue with the preparation method specified by the coating manufacturer, then apply fresh coating to the corrected section or, when appropriate, the entire panel.
An isopropyl alcohol preparation wipe is common, sometimes using a diluted solution, but the exact concentration and method should follow the product instructions. An overly strong solvent, an unsuitable towel, or aggressive wiping can create its own problems. The purpose is to leave a clean, residue-free surface for the new coating, not to repeatedly scrub the panel in search of a chemically perfect blank slate.
The rest of the car may be fine. The coating installed last week has not been touched by the polish on the repaired fender. Only the area corrected by abrasion has been compromised, and only that section may need to be redone. This is one practical advantage of working in tight sections during the original application: a localized mistake can have a localized fix.
We like to think of each panel as its own job. If one section fails, we are redoing a fender, not automatically the whole hood. Whether a spot repair will blend acceptably depends on the coating, the panel, the amount of correction, and the owner’s expectations. On a high-visibility panel, recoating the entire panel can produce the most uniform result. On a small area with a clean boundary, a localized repair may be entirely reasonable.
The recoat follows the same discipline as the original installation:
- Prepare the corrected surface according to the coating manufacturer’s directions.
- Apply a controlled amount of product rather than trying to compensate for the repaired area with excess material.
- Level the new film within the specified wipe-off period.
- Inspect with a work light from several angles.
- Protect the vehicle from moisture, contamination, and washing for the period required by that product.
- Recheck the repaired panel after the initial cure, when any remaining high spot will be easier to see.
The new film may bond across the repaired section and the surrounding coating, but no touch-up should be described as invisible by definition. A practiced eye may still find where the work was done, especially when the correction changed the surrounding film thickness or the panel was polished over a wider area. That is the nature of working with semi-permanent coatings. Perfection during the install is cheaper than perfection after the fact.
The long-term reality is that ceramic coatings do not fail because high spots exist. High spots are installation defects. They are created by excess material, delayed leveling, poor lighting, an overheated panel, or a product that was allowed to flash beyond its intended wipe-off stage. Once corrected and properly recoated, the panel can return to normal service.
Maintenance still matters. Wash with a coating-safe shampoo, use clean wash media, avoid abrasive contact, and do not mistake a hydrophobic topper for a repair to a physical defect. A silica-based maintenance product can refresh water behavior, but it will not level a raised ceramic film. It may temporarily change how the mark looks under water without changing the underlying problem.
Full cure also varies by product and conditions. The vehicle may be safe for limited use before the coating reaches its final hardness, but exposure to rain, road spray, dust, or washing during the early cure period can affect the finish. Follow the coating’s instructions rather than borrowing a cure time from a different bottle. “Ceramic coating” is a category, not one single chemical with one universal schedule.
The mistake that becomes a permanent feature of the panel is the one that gets ignored. You see it and level it during the initial wipe-off period, or you investigate whether the product still permits re-emulsification while it is partially cured, or you polish it once the chemistry has closed that option. None of those fixes is necessarily difficult, but each requires the right response for the stage the coating is in.
What is difficult — and what can cost real money in clear coat — is treating every coating as if it follows the same clock. Some products give a generous leveling period. Some fast-curing formulas demand immediate attention. Some may permit re-emulsification for several hours, potentially up to about twelve under suitable conditions; others may be too far along well before that. Manufacturer instructions, panel temperature, product thickness, and what the surface is actually doing all belong in the decision.
The useful way to think about the process is not as three fixed deadlines but as three changing stages:
1. The active flash stage: level the excess with a clean towel while the coating is still intended to be moved.
2. The partial-cure stage: if the manufacturer supports it, a small amount of fresh product may re-emulsify the high spot, with earlier correction offering the best chance of success.
3. The cured stage: stop trying to dissolve the defect and move to controlled mechanical correction.
Pick the response that matches the coating in front of you. Watch the surface instead of trusting a universal timer. Use light before the panel leaves the bay, and never assume that a high spot will improve simply because the rest of the coating is becoming harder.
The coating will forgive a missed step only while its chemistry allows it. After that, the repair belongs to the polisher, the pad, and the clear coat you are trying not to spend.