Paint depth gauges: do you need one before compounding?
A polishing pad does not know whether it is working on a healthy factory clear coat or the last thin skin left above a previous repair. It only knows pressure, speed, heat, and friction.
Judson Grier·Updated: August 12, 2026·17 min read
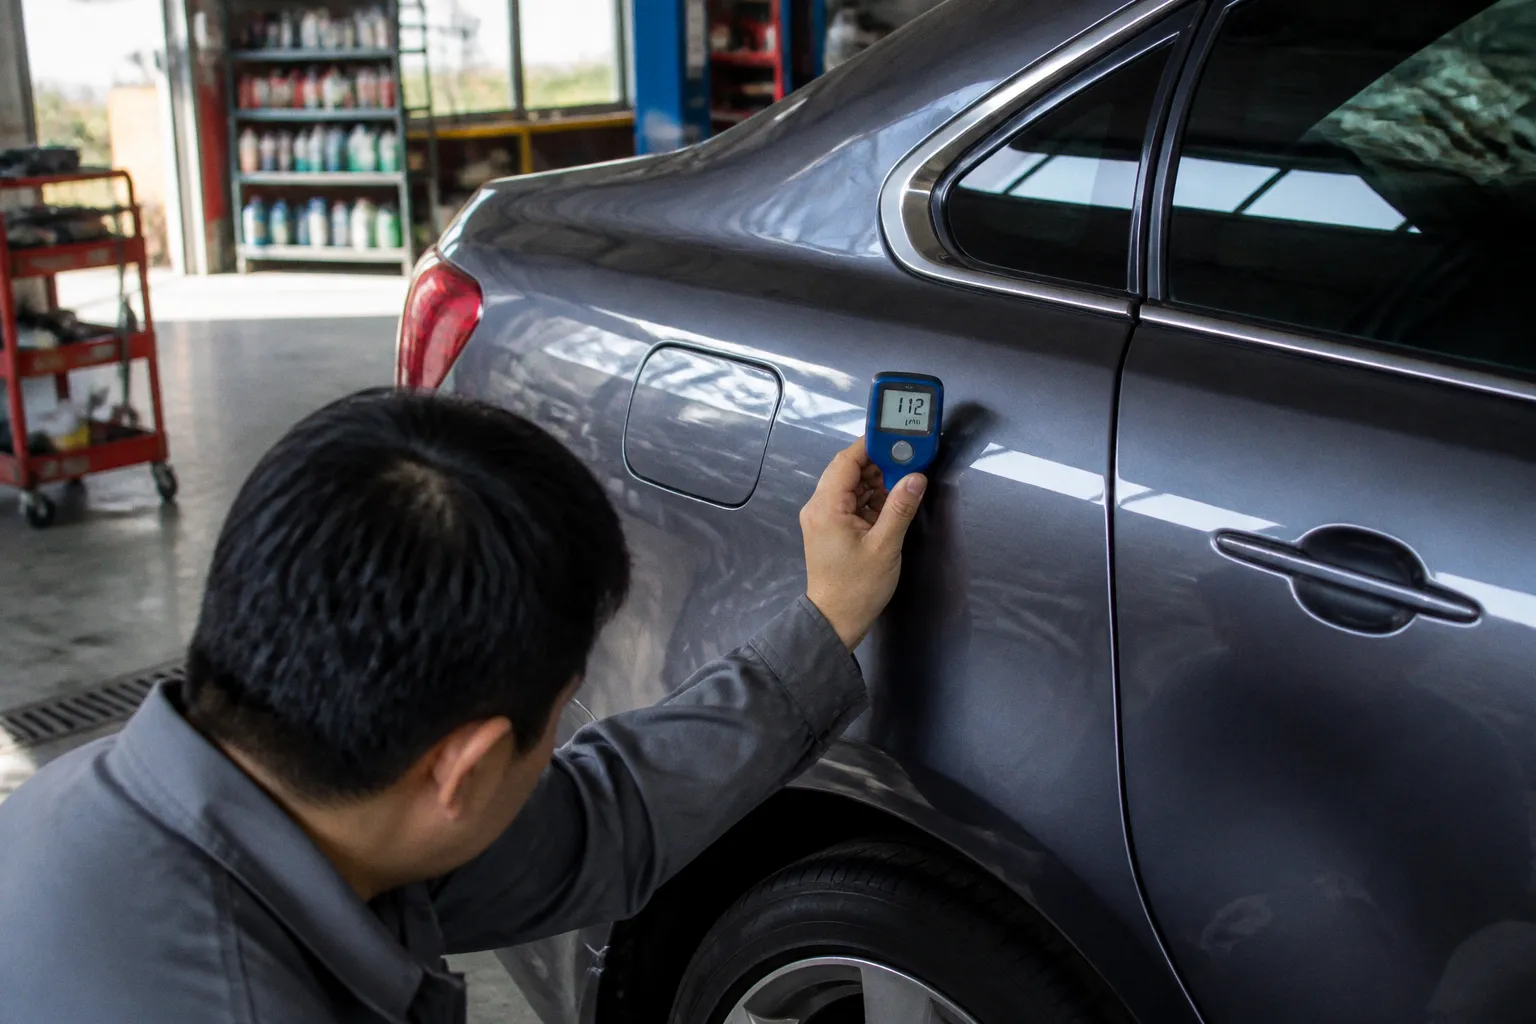
When the compound starts to shear material from the surface, the machine will keep moving long after the panel has become unsafe.
That is why a paint depth gauge for paint correction is more than a gadget for professional shops. It gives us a working map of the vehicle before we start removing defects. It will not tell you exactly how much clear coat remains, and it will not replace a test spot or mechanical judgment. But it can reveal thin panels, previous sanding, repainted sections, and uneven areas before the pad turns a correction job into a repaint.
What a paint depth gauge actually measures
The first thing to understand is what the instrument can and cannot see.
A standard paint depth gauge measures the total film build between the probe and the metal substrate. On a typical steel panel, that reading includes some combination of:
- Primer or e-coat
- Base coat
- Clear coat
- Older repair paint
- Additional material left by sanding, filler, or repainting
If the gauge shows 112 microns, it is not saying that you have 112 microns of clear coat available. It is saying that the entire coating stack measures approximately 112 microns at that point.
That distinction matters because the clear coat is only one part of the total thickness. On many modern vehicles, total factory paint thickness falls roughly between 95 and 125 microns, or about 3.7 to 4.9 mils. The clear coat itself may account for approximately 30 to 50 microns, although the exact layer distribution varies by manufacturer, model, paint system, and repair history.
A standard gauge cannot separate those layers. Advanced ultrasonic instruments, such as gauges designed to read individual non-metallic layers, can provide more detail, but they are a different class of tool and a considerable expense for most home detailers.
So we should treat a conventional paint gauge as a risk-mapping instrument. It identifies variation. It helps us locate thin areas and suspiciously thick panels. It allows us to compare one part of the vehicle with another. It does not hand us a precise “safe polishing depth” number.
A paint depth gauge does not measure permission to compound. It measures how much uncertainty we are starting with.
The quality of the reading depends on the instrument and the surface beneath it. Steel, aluminum, and plastic panels may require different measurement principles. A gauge intended for ferrous substrates may not behave correctly on aluminum. Most standard instruments will not read plastic bumpers at all, or will require a different method. Before taking the numbers seriously, we need to confirm that the gauge is suitable for the panel material.
Establish a baseline before touching the paint
We should measure the car while the paint is clean, dry, and free from loose contamination. A dusty panel can prevent the probe from seating properly. Heavy wax, dressing, or residue may also affect repeatability, especially when the instrument is inexpensive or the surface is curved.
The practical process is straightforward, but the discipline matters:
1. Clean the panel thoroughly. Wash, dry, and remove bonded contamination before measuring. A clay bar may be necessary if the surface feels rough, but do not drag contamination across the paint while taking readings.
2. Confirm the substrate. Identify whether the panel is steel, aluminum, or another material. Use the correct gauge mode and calibration procedure.
3. Calibrate the instrument. Use the supplied reference standards rather than assuming the factory setting is still accurate.
4. Take several readings per panel. One number tells us very little. A spread across the panel tells us where the coating changes.
5. Record the values. A simple note on a sketch of the vehicle is enough. We want a baseline before correction and a record if we measure again later.
6. Avoid placing the probe on edges, body lines, badges, or deep curves unless the tool is designed for them. The contact may be inconsistent, and those areas are already higher-risk.
For a broad flat door, we might measure the upper, middle, and lower sections, then add readings near the front and rear edges without pressing the probe onto the actual fold. On a hood or roof, a grid of readings gives us a better picture than a single center measurement.
Repeatability is more useful than false precision. If the same area reads 108, 109, and 108 microns, the tool is giving us a stable reference. If it jumps from 96 to 119 to 103 at the same location, we need to address the technique, the surface, or the gauge before making decisions.
A good record also shows how the vehicle was built. Factory paint tends to produce a relatively consistent range, though not perfectly. A panel that repeatedly reads much higher than the rest of the vehicle deserves investigation. A panel that reads lower, particularly near an edge or previous repair, deserves restraint.
Reading the danger zones: edges, curves, and thin paint
Flat sections are usually the forgiving part of a panel. Edges are where the margin disappears.
Paint on panel edges and tight curves is commonly 25% to 50% thinner than on broad flat areas. This is partly a result of how paint is applied and how it settles around the geometry. The machine pad also behaves differently there: less foam contacts the surface, pressure concentrates on a smaller area, and the backing plate or pad edge can generate more heat and friction.
That combination makes an edge easy to burn through even when the nearby flat section appears healthy.
The most exposed areas include:
- The sharp edge of a hood, trunk, or door
- Creases running through a fender or quarter panel
- The upper corners of bumpers
- Around emblems and door handles
- Narrow strips beside lamps and grilles
- The lip of a body line
- Sanded edges from a previous repair
- Areas where the clear coat has already begun to fail
A gauge reading taken on the flat part of a hood does not automatically apply to the hood edge. The coating may be materially thinner there, and the measurement itself may be less reliable because the probe cannot sit squarely.
We should therefore treat edges as separate work zones. Tape them when using an aggressive compound. Reduce machine speed and pressure. Keep the pad face flat. Do not chase the last isolated scratch across a body line simply because the surrounding paint measured well.
A reading below approximately 75 microns, or 3 mils, is generally a serious warning for compounding. That does not mean every panel below that number will fail immediately, because the gauge is measuring the total stack and the panel construction varies. It means the available margin is poor enough that aggressive correction is not a sensible starting point.
At the other end, a reading above 198 to 200 microns often suggests repainting, body filler, or a substantial amount of additional material. That panel may have more coating than a factory panel, but thickness alone does not tell us how well the layers are bonded or how much clear coat is actually present. A thick repaired panel is not automatically a safe panel.
The door jamb method: useful estimate, not laboratory measurement
When we do not have an ultrasonic gauge, the door jamb method can help us form a rough estimate of the clear coat contribution.
The idea is simple. We measure the exterior painted panel, then compare it with a nearby jamb or inner painted area that typically has little or no clear coat. The difference may give us a rough indication of how much clear coat is present on the exterior surface.
For example:
- Exterior door reading: 118 microns
- Nearby jamb reading: 82 microns
- Approximate difference: 36 microns
That 36-micron difference may broadly correspond to the clear coat and some variation in the underlying layers. It should not be treated as an exact measurement. Primer and base coat thickness can vary between the jamb and the outside of the panel, and the paint process may not be identical in both locations.
The method becomes more useful when we take multiple readings and look for a pattern. If the exterior of a door is consistently around 115 to 120 microns and the jamb is around 80 to 85, we have a reasonable working estimate. If the numbers wander dramatically, the comparison is much less dependable.
We should also compare the jamb with the same panel rather than borrowing a value from another part of the vehicle. A front door, rear quarter, and trunk lid may not carry the same coating build. The aim is not to calculate a perfect clear coat thickness. The aim is to avoid pretending that total film build equals clear coat.
This limitation is particularly important on older imports and vehicles that have seen multiple repairs. A repaint may have been blended into a neighboring panel, and a localized repair may not be obvious from the outside. The gauge helps reveal that story, but it does not narrate every layer.
Calculating a correction budget
Compounding is controlled paint removal. The defects may be shallow, but removing them means removing some clear coat around them. The question is not whether we can make the panel look better. We usually can. The question is how much material we need to sacrifice to get there and whether the improvement justifies the loss.
A normal machine polishing and compounding session may remove around 2 to 3 microns of clear coat, depending on the pad, abrasive, pressure, speed, working time, paint hardness, and defect severity. Aggressive compounding with a microfiber or rotary wool pad can remove roughly 5 to 8 microns in a single session.
Those ranges are not guarantees. A hard clear coat may resist the same combination that cuts quickly on softer paint. A slow arm speed, high pressure, and repeated passes can change the result. The only reliable way to understand the behavior of a particular paint system is to perform a controlled test spot and inspect the result.
Paint manufacturers commonly recommend removing no more than about 0.5 mil, or approximately 12.5 microns, of clear coat over the vehicle’s entire life in order to preserve UV protection. That is a lifetime budget, not an annual allowance. If the vehicle has already been polished several times, we may have no dependable way to know how much of that budget remains.
This is where the gauge changes the strategy. Suppose a factory-looking panel reads 110 microns across the flat areas, while a neighboring repaired panel reads 176 microns. We do not conclude that the repaired panel can tolerate unlimited correction. We conclude that the two panels should not be treated as identical. The repaired panel may have more total material, but its clear coat thickness, hardness, and adhesion remain uncertain.
A sensible correction plan uses the least aggressive combination that achieves the desired improvement:
| Paint condition | Sensible starting approach | What the gauge contributes |
|---|---|---|
| Stable readings in a normal factory range, minor swirls | Fine polish and soft or medium foam | Confirms that no isolated thin area is being overlooked |
| Normal readings, moderate oxidation or scratches | Test spot with a medium compound and controlled pad | Helps set a correction limit before repeating the process |
| Readings below roughly 75 microns | Avoid aggressive compounding; consider light polishing or preservation | Identifies a panel with little total material to spare |
| Strongly varied readings across one panel | Work in small zones and reduce correction goals | Shows that the panel may contain repair or localized thinning |
| Readings around 198–200 microns or higher | Treat as likely repainted or filled until examined further | Warns that factory assumptions no longer apply |
| Low readings near edges or body lines | Tape, reduce pressure, and avoid chasing defects | Reinforces that geometry can be more dangerous than the average reading |
The most common mistake is to use the highest number on the screen as a license to compound harder. That is backwards. We should build the plan around the thinnest credible reading and the most vulnerable geometry, not the thickest repaired section.
Correction is not a contest to erase every mark. It is a decision about which defects are worth the clear coat they cost.
Test spots still outrank the gauge
A paint depth gauge tells us how much material exists in total. It does not tell us how hard the paint is, how deeply a scratch extends, or how fast a given pad and compound will remove material.
Two panels with identical readings can behave very differently. One may have a hard European clear coat that needs several controlled passes. Another may have a soft Japanese finish that responds quickly to a mild polish. The number on the gauge cannot distinguish those formulations.
The test spot gives us the missing information.
Choose a representative area away from an edge and divide it mentally into small sections. Start with a mild combination: a polishing pad and a finishing or medium polish. Work the product for a controlled number of passes, wipe the panel, and inspect it under the same lighting used to judge the defects. If the result is insufficient, step up one variable at a time rather than moving immediately to the most aggressive pad and compound available.
After the test spot, measure again if the gauge is repeatable enough to show a meaningful change. A difference of a few microns may fall within the instrument’s normal variation, so we should not treat every change on the display as a precise record of material removed. Still, repeated readings across a controlled area can help us understand whether the chosen process is consuming a little or a lot.
Lighting matters as much as measurement. A deep scratch that disappears in diffuse daylight may remain obvious under a sharp inspection lamp. If the scratch reaches the base coat or primer, more compounding will not restore the missing color. We can soften its edges, reduce its contrast, or leave it alone. Continuing to cut simply because the line is still visible is how a repairable panel becomes a failure.
The same logic applies to clear coat failure. Chalking, peeling, and delamination are not defects that can be polished back into health. Abrasive work on failing clear coat usually shears away more of the loose material and exposes the problem further.
Using readings to find repainted panels
Variation is often more informative than the absolute number.
A vehicle with factory paint may show readings within a broad but recognizable band. A door that measures around 105 to 120 microns across several locations is behaving differently from a quarter panel that repeatedly reads 165, 184, and 214 microns. The second panel may have been repainted, blended, or repaired with filler.
A high reading does not prove exactly what happened. It can indicate additional paint, filler, or a heavy repair, but we should confirm the pattern with visual and tactile clues:
- Slight differences in orange peel between adjacent panels
- A hard tape edge or blend line near a pillar
- Overspray on rubber seals or trim
- Uneven reflections under a strong inspection light
- Sanding marks beneath the clear coat
- A different shade or metallic orientation
- A panel gap that does not match its neighbors
- Filler or repair indications from a separate inspection tool
Repainted panels may be safer to correct than thin factory panels, but they may also contain a thin or uneven clear coat over a much thicker underlying stack. The gauge cannot distinguish those possibilities by itself.
Readings that suddenly drop near a blend zone deserve particular care. A repairer may have polished through the clear coat at the edge of a blend, or a previous detailer may have worked the same area repeatedly. We should not average the number across the whole panel and assume the low spot is unimportant. Paint failure happens at the weak point.
On imported vehicles, this kind of mapping is especially useful because service history can be incomplete, and body repairs may have occurred in different markets with different refinishing standards. A clean-looking car can still carry several generations of repair beneath the surface.
Choosing and using a gauge for detailing
For occasional work, a basic gauge can be valuable if we understand its limitations and use it consistently. The expensive part is not always the instrument itself; it is the habit of measuring before the pad touches paint.
When choosing a paint gauge for detailing, look for:
- Compatibility with both steel and aluminum panels if you work on mixed-material vehicles
- A probe that seats consistently on curved surfaces
- Calibration standards included with the instrument
- Repeatable readings rather than impressive-looking resolution
- A clear display that can be read while moving around the vehicle
- The ability to store or export measurements if you routinely document work
- Manufacturer guidance on non-metallic panels and measurement limits
A display that reports readings to a tenth of a micron does not necessarily provide that level of real-world accuracy. Surface curvature, probe angle, temperature, contamination, and substrate variation all affect the result. We want a stable instrument and a repeatable method, not decorative precision.
Keep the probe perpendicular to the surface and use light, consistent contact. Do not slide it across the paint. Take readings in the same locations when comparing before and after correction. If the vehicle has a protective film, thick coating, or unusual finish, recognize that the gauge may be measuring more than the original paint system.
Ceramic coating does not solve this problem. A coating may add a small amount of film, but it does not restore clear coat removed by previous compounding, and it cannot replace the UV protection of a healthy paint layer. If the paint is already near its correction limit, the answer is preservation, not a thicker chemical layer.
So, do you need one before compounding?
If you compound vehicles regularly, work on used imports, correct neglected paint, or accept customer cars with unknown history, a paint depth gauge is one of the more rational tools you can own. It prevents avoidable surprises and helps us separate a normal correction from a panel that needs restraint.
If you polish your own car once or twice a year, the gauge is helpful but not mandatory. Careful washing, strong lighting, a test spot, conservative pad and compound choices, and respect for edges will carry much of the load. The gauge adds information; it does not remove the need for judgment.
The safest working order remains simple:
1. Measure and map the vehicle.
2. Identify low, high, and inconsistent readings.
3. Protect edges and body lines.
4. Perform the least aggressive useful test spot.
5. Inspect the result before repeating it across the panel.
6. Stop when the improvement no longer justifies the material being removed.
That last step is the one we tend to resist. A machine makes the correction feel productive: the pad turns, the defects fade, and the panel becomes brighter. But clear coat is not an unlimited surface. Once removed, it does not grow back because the finish looks glossy under fresh protection.
A paint depth gauge will not make a reckless correction safe. Used properly, it does something more valuable: it makes the hidden condition of the vehicle visible enough for us to choose restraint before the damage is permanent. Over the long life of an import, that restraint is what keeps the paint intact—not one spectacular polishing session, but the decision to leave a little material in reserve every time we put the machine down.