Headlight restoration kits: abrasive vs chemical methods
A chemical headlight restoration kit can remove light surface haze in 5 to 10 minutes. It cannot remove deep polycarbonate oxidation.
Aldous Moorland·Updated: August 14, 2026·15 min read
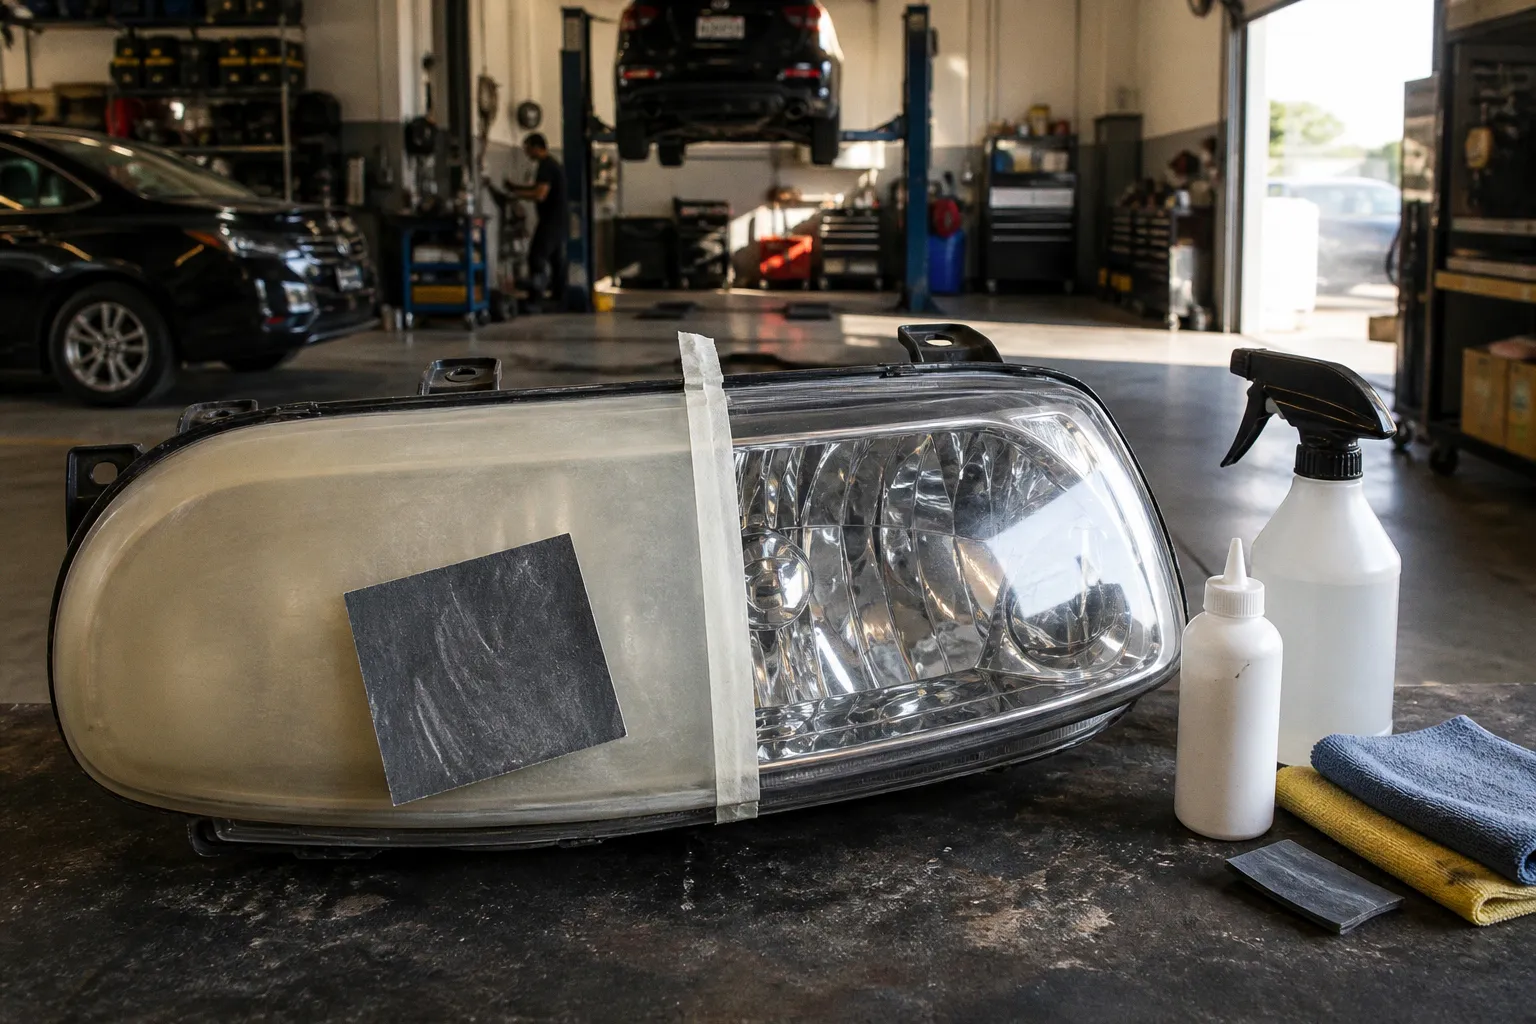
An abrasive headlight restoration process can remove that damaged layer, but only when the lens is sanded through a controlled grit sequence and protected immediately afterward.
Compare car rental deals in United Kingdom
See available offersPartner link — DiscoverCars comparisonThe distinction is material removal. Chemical and polish-only products improve the appearance of the existing surface. Wet-sanding removes the degraded OEM hardcoat and creates a new optical surface. The two methods are not interchangeable, despite similar packaging and similar claims on retail shelves.
For light haze, a chemical headlight restoration kit can be adequate. For yellowing, chalking, persistent cloudiness, or oxidation visible after washing, the more durable solution is abrasive restoration followed by UV protection.
A quick wipe corrects the appearance of light haze. It does not rebuild the surface that ultraviolet exposure has destroyed.
The mechanics of polycarbonate oxidation and lens degradation
Most modern headlight lenses are made from polycarbonate. The material is impact-resistant and optically suitable for automotive lighting, but it is vulnerable to ultraviolet radiation and environmental abrasion. A factory-applied hardcoat provides the initial barrier. Over time, that layer loses clarity.
The failure is progressive.
1. Ultraviolet exposure alters the outer protective layer.
2. Heat cycles accelerate surface degradation.
3. Road grit creates fine mechanical scratches.
4. Washing compounds and airborne contaminants add additional abrasion.
5. The surface becomes porous, irregular, and optically diffuse.
6. Yellowing or white haze becomes visible from outside the lens.
The lamp may still illuminate. That does not mean the lens remains optically correct. A hazed lens scatters light before it reaches the road. The beam pattern loses definition. Glare can increase. The defect is external, but the effect is part of the lighting system.
The first diagnostic separation is depth. Surface contamination can be removed with washing, decontamination, or clay treatment. Oxidation cannot. If the cloudiness remains after the lens has been cleaned and dried, material degradation is present.
A second separation concerns uniformity. Light haze often appears as a thin, even film. Severe oxidation is irregular. It presents as yellow patches, white chalking, embedded microcracks, or a surface that remains dull after repeated polishing.
The following comparison defines the practical difference between the available approaches:
| Parameter | Chemical or polish-only method | Abrasive wet-sanding method |
|---|---|---|
| Primary action | Softens, dissolves, or polishes the outer haze | Removes oxidized material mechanically |
| Typical application time | 5 to 10 minutes | Approximately 30 to 60 minutes for a complete DIY process |
| Suitable damage | Light surface haze and early clouding | Deep oxidation, yellowing, chalking, and persistent dullness |
| Sandpaper required | No | Typically 600–1000 grit initially, progressing to 2000–3000 grit |
| Surface preparation | Cleaning and drying | Masking, cleaning, wet-sanding, refinement, and polishing |
| Finish after treatment | Improved clarity with the existing surface exposed | New polished surface requiring UV protection |
| Typical unsealed durability | Approximately 6 to 12 months | Not meaningful without a protective layer |
| Main failure mode | Temporary improvement with rapid re-hazing | Visible sanding scratches, uneven removal, or re-oxidation |
| Material risk | Chemical staining or uneven finish | Over-sanding, heat damage, or incomplete scratch refinement |
The correct method is therefore selected by the condition of the lens, not by the advertised application time.
Chemical wipe-on restorers: speed and limitations for light haze
A chemical headlight restoration kit is designed for a narrow operating window. The surface must be degraded, but not deeply damaged. The product may contain a solvent, a reactive coating, a polymer system, or a single-step polishing compound. Exact formulations vary between brands.
The common feature is limited physical removal.
When the outer haze is thin, the result can be visually convincing. The lens is cleaned, dried, and treated. The surface becomes more transparent. No sanding marks are introduced. The process can be completed in 5 to 10 minutes, depending on the product and preparation.
That speed has a direct limitation. A wipe-on treatment does not normally remove a thick oxidized layer. It may soften or mask the upper surface. A polish may cut a small amount of material. Neither process should be treated as equivalent to stripping the degraded hardcoat with controlled abrasives.
A chemical method is appropriate when all of the following conditions are present:
- The lens has light, uniform haze rather than deep yellowing.
- No pronounced chalking or flaking is visible.
- The surface remains relatively smooth after washing.
- The lens becomes substantially clearer after a light polish test.
- The owner accepts a shorter service interval.
- A compatible UV sealant is included or applied afterward.
The process becomes unsuitable when the surface remains cloudy after treatment. If clarity improves only temporarily, the defect is deeper than the product’s working range. Repeating the same application does not change the depth of the oxidation. It only repeats the temporary correction.
The most common mistake is interpreting a strong visual change as evidence of full restoration. A solvent can alter the appearance of the uppermost layer. A polymer can fill microscopic irregularities. A polishing compound can remove fine defects. None of these actions proves that the damaged material has been fully removed.
There is also a preparation requirement. The lens must be washed with a suitable car wash shampoo, rinsed, and dried before treatment. Road film and embedded contamination interfere with even coverage. If the surface is contaminated, the chemical product may leave streaks or isolate patches of untreated haze.
The product must also be kept off adjacent paint and trim. Some compounds stain porous plastics. Some solvents soften existing coatings. Masking is not always required for a five-minute application, but it reduces the risk of an avoidable finish defect.
A chemical restoration can therefore be classified as a maintenance correction rather than a structural restoration. It is efficient against light haze. It is inefficient against advanced oxidation.
Abrasive wet-sanding: the multi-step process for deep restoration
Abrasive headlight restoration removes the damaged surface in measured stages. The lens is not polished clear in one operation. It is cut with a coarse abrasive, refined with progressively finer abrasives, and then polished until the remaining sanding marks are reduced below visible optical significance.
The starting grit depends on the damage.
- Severe oxidation may require 600–800 grit.
- Moderate oxidation may be addressed with 800–1000 grit.
- A sounder lens with fine haze may begin at 1000 grit or finer.
- Intermediate stages commonly move through 1500 and 2000 grit.
- Final refinement may reach 2500–3000 grit before polishing.
These ranges are not decorative specifications. Each grit has a defined task. A coarse abrasive removes material quickly and leaves deep scratches. A finer abrasive must remove the scratches from the previous stage. If the progression is skipped, the lens can remain hazy even after machine polishing.
The lens must be kept wet during sanding. Water reduces friction, carries away abrasive debris, and limits heat buildup. The work should be distributed across the entire affected area. Concentrating pressure in one location creates an uneven surface and can produce visible optical distortion.
A practical sequence is as follows:
1. The lens is washed and dried.
2. Surrounding paint, trim, and rubber are masked.
3. The surface is inspected under direct light.
4. A suitable initial grit is selected according to oxidation depth.
5. Wet-sanding is performed until the original yellow or chalked surface has been uniformly removed.
6. The next finer grit is applied in a controlled direction.
7. The direction can be changed between stages to expose remaining scratches.
8. Sanding continues through approximately 2000–3000 grit.
9. The lens is polished with a compatible compound.
10. A UV-resistant protective layer is applied before the lens is returned to service.
The intermediate inspection is decisive. After the coarse stage, the lens may look uniformly dull. That is expected. A uniform dull finish indicates that the damaged layer has been addressed evenly. Remaining yellow patches indicate incomplete removal. At that point, polishing is premature.
If yellow areas remain, sanding continues with the current grit. If the lens is uniformly opaque but free of yellow patches, refinement can proceed. If deep scratches remain after the finer stages, the prior grit was either applied for too little time or skipped too quickly.
Machine polishing requires separate control. Polycarbonate does not tolerate uncontrolled heat. Excessive pad pressure, high rotational speed, or prolonged work in one area can burn the surface or produce persistent haze. The pad must remain in motion. The lens must be inspected between passes. A polished lens that still shows directional sanding marks has not been refined sufficiently.
Wet-sanding is not a single operation. It is a sequence in which each abrasive must remove the damage created by the previous one.
The expected DIY time for a complete abrasive restoration kit is approximately 30 to 60 minutes. That estimate assumes both lenses are accessible, the materials are prepared, and the process is not interrupted by severe coating failure or additional damage. The time is not comparable to a five-minute chemical wipe because the tasks are different. One applies a product. The other removes and reconstructs a surface finish.
How to choose between the two methods
The best headlight restoration method is selected with a conditional decision, not a universal product preference.
If the lens has light haze
A chemical or polish-only method can be selected if the lens is smooth, evenly cloudy, and free from deep yellowing. A light correction may restore acceptable clarity with minimal labor.
The protective step must still be included. If the treatment exposes or weakens the original surface, the lens remains vulnerable to ultraviolet degradation. A UV sealant or compatible coating should be applied according to the product’s instructions.
If the lens has deep oxidation
Abrasive restoration is required if yellowing, chalking, or patchy oxidation remains after cleaning. A chemical wipe does not remove enough material to correct the defect. The initial grit must be strong enough to remove the damaged layer, but not so coarse that unnecessary material is stripped from a sound area.
If the lens has deep scratches
Abrasive restoration may reduce surface scratches, but it is not a universal repair for impact damage. If the lens contains cracks, internal delamination, or damage below the outer surface, external polishing cannot restore the original structure.
If the lens is already clear but the beam is incorrect
Restoration is not the first diagnostic step. The headlight assembly should be inspected for bulb seating, reflector condition, moisture intrusion, wiring faults, and beam alignment. A clear lens cannot correct an internal lighting fault.
If the lens has a factory coating that is partially failing
The surface may require complete and even removal of the failed layer. Partial polishing can create a patchwork finish. If one section is clear and another remains chalked, the boundary may become more visible after treatment.
The decision can be reduced to four gates:
1. After washing, does haze remain?
If no, cleaning was sufficient. If yes, continue.
2. Is the haze thin and uniform?
If yes, chemical correction may be adequate. If no, use abrasive removal.
3. Does the surface remain yellow or chalked after a short test area?
If yes, the chemical method has reached its limit. Sanding is required.
4. Has any outer coating been removed?
If yes, UV protection is mandatory before the repair is considered complete.
This logic avoids the central error: using a fast treatment on a defect that requires controlled material removal.
UV protection determines whether the repair survives
Abrasive restoration removes the oxidized outer layer. That is the reason clarity improves. It is also the reason the lens becomes unprotected.
A newly polished polycarbonate lens is not finished when it becomes transparent. It is finished when a compatible UV-resistant protective layer has been applied and cured or set as required. Suitable systems can include a dedicated UV sealant, a 2K clear coat, or a ceramic wipe product designed for restored headlights.
Chemical-only and polish-only treatments also require protection when the original UV barrier has been weakened or removed. Without a dedicated protective layer, these methods commonly degrade within 6 to 12 months. The exact interval depends on exposure, climate, washing, coating chemistry, and preparation quality. The number should be treated as a practical range, not a guarantee.
The protective layer must be applied to a clean, residue-free surface. Polishing oils, compound residue, and water spots can interfere with adhesion. The lens should be wiped according to the coating manufacturer’s process. If the product requires a curing period, the vehicle should not be exposed to rain, washing, or condensation during that interval.
A sealant is not interchangeable with any exterior wax. A standard paint wax may improve surface appearance but does not necessarily provide the optical durability or UV resistance required for polycarbonate. The product must be intended for headlight lenses or compatible plastic surfaces.
The coating must also be applied evenly. Thin spots become early failure points. Runs and pooling create optical irregularities. The final surface should be inspected under direct light after application and again after the product has set.
Abrasive restoration without UV protection is an incomplete repair. The surface may be clearer immediately, but the underlying failure has been recreated by removing the old protection and omitting the replacement.
Common process failures and their diagnostic signatures
The finish itself reveals which stage was mishandled.
Yellow areas remain after sanding
The damaged layer was not removed uniformly. More work is required with the current grit. Polishing at this stage will improve gloss over an inconsistent base and will not correct the color difference.
The lens is clear but contains straight visible lines
The prior sanding marks were not refined by the next grit. The surface should be returned to the appropriate abrasive stage. Increasing machine-polisher speed will not remove a scratch pattern efficiently if the preparation sequence is incomplete.
The lens appears milky after polishing
Possible causes include residual coarse scratches, compound residue, excessive heat, or an incompatible pad and compound combination. The surface should be cleaned and inspected before additional polishing. If heat damage has altered the plastic, further aggressive polishing can increase the defect.
The lens is clear immediately but re-hazes quickly
The protective layer was absent, incomplete, incompatible, or poorly bonded. A chemical or polish-only treatment may also have been used beyond its effective depth. The corrective procedure is not another wipe. The surface must be reassessed, restored if necessary, and sealed.
The finish is uneven around the edges
The abrasive did not reach the full affected area, or the coating was applied inconsistently. Edges and contours require controlled hand work. Excessive pressure on a narrow edge should be avoided because material removal becomes disproportionate.
Paint or trim has been stained
The surrounding area was insufficiently protected, or the chemical product was incompatible with the adjacent material. The defect is separate from lens clarity. It should not be corrected by extending the chemical dwell time.
These signatures are more useful than product claims. The lens records the process. Uniformity, scratch direction, haze depth, and coating behavior provide enough information to identify the failed step.
DIY kit cost versus professional restoration
A typical DIY headlight restoration kit costs approximately $25. Professional service commonly falls in the $100–$150 range. The price difference is not only labor. It reflects process control, equipment, coating selection, and the technician’s ability to manage uneven oxidation or damaged surfaces.
A DIY kit is financially rational when the lens condition is moderate, access is easy, and the operator can maintain the grit sequence. The process has low material cost but a high sensitivity to technique. A single skipped stage can leave scratches that are difficult to diagnose after polishing.
Professional service is more defensible when:
- The lenses have severe or uneven oxidation.
- The vehicle has complex lens contours.
- The surrounding paint is difficult to mask.
- Machine polishing equipment is unavailable.
- A 2K clear coat or professional UV system is required.
- The lens has already been damaged by prior sanding or polishing.
- Optical clarity must be restored evenly across both assemblies.
The service price should be evaluated against the final protection, not only the initial clarity. A low-cost treatment that re-hazes within 6 to 12 months may cost less at the first application and more over repeated cycles. A higher-cost abrasive process with proper UV protection may provide the more stable result, although exact coating life cannot be assigned without controlled testing of the specific product and exposure conditions.
A professional service also does not remove the need for inspection. The work should be judged by the same physical criteria:
- The yellow or chalked surface has been removed evenly.
- No coarse directional sanding marks remain.
- The lens is free of polishing haze.
- The protective layer covers the full restored area.
- The coating has been given the required setting or curing time.
- The final beam remains correctly aligned.
The correct method by lens condition
The comparison is direct.
A chemical headlight restoration kit is a short-cycle correction for light haze. It is appropriate when the defect is superficial and uniform. Its 5-to-10-minute application time is the principal advantage. Its limitation is the absence of substantial material removal. Without UV protection, durability commonly remains within the 6-to-12-month range.
An abrasive headlight restoration kit is a controlled surface-renewal process. It is appropriate for deep oxidation, yellowing, and chalking. The 600–1000 grit starting range allows the damaged layer to be removed. Progression toward 2000–3000 grit refines the scratch structure before polishing. The process takes longer, but it addresses the actual failure rather than its appearance.
The protective step controls the result in both cases. A restored lens without UV resistance remains exposed to the same mechanism that caused the original haze.
The final baseline is exact:
- The lens must be uniformly clear under direct inspection.
- No yellow or chalked patches may remain.
- No visible coarse sanding lines may remain after polishing.
- The outer surface must be covered by a compatible UV-resistant sealant, 2K clear coat, or ceramic wipe.
- The coating must be allowed to set or cure as specified.
- The headlight beam must be checked after reinstallation or final cleaning.
If the lens fails the first three conditions, the restoration is incomplete. If it fails the fourth, re-oxidation has been left unaddressed. If it fails the fifth, the protective layer may not bond correctly. If it fails the sixth, optical clarity alone has not verified the lighting system.