Leather seat crack repair: durability of DIY filler kits
A leather seat crack filler can make a damaged bolster look convincing on Saturday and begin peeling by the following month. The difference is rarely the color match alone.
Judson Grier·Updated: August 15, 2026·16 min read
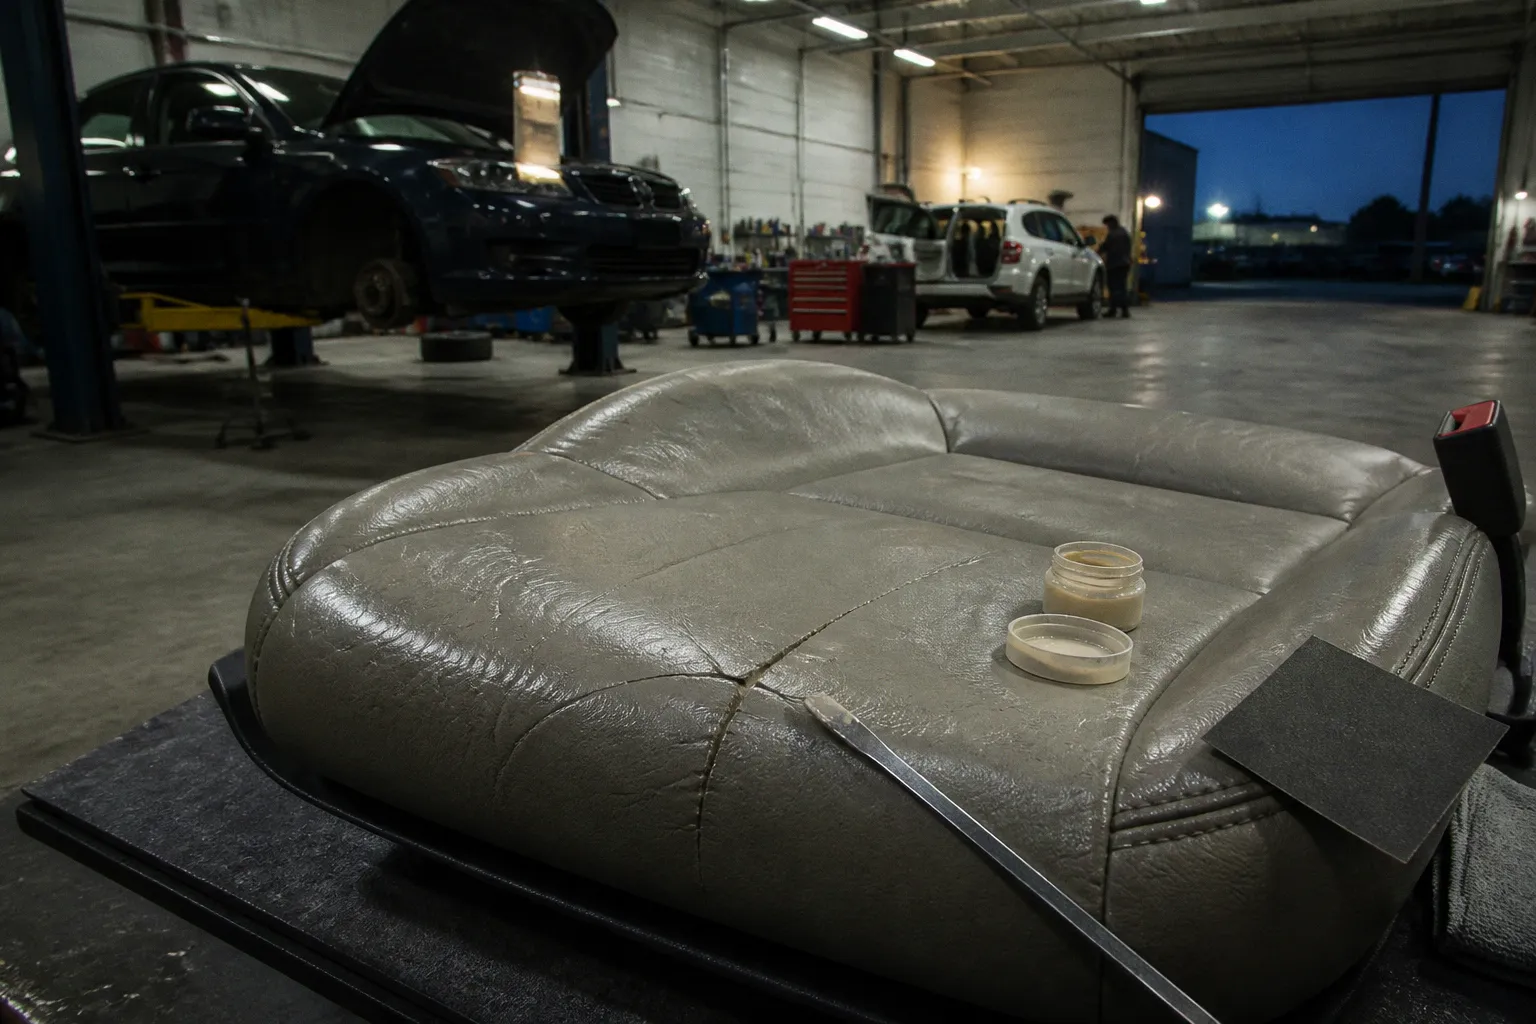
It is usually the movement beneath the repair: the seat foam compresses, the leather stretches, the driver slides across the bolster, and heat cycles soften one layer while tightening another. If the filler cannot move with the original material, the repair shears apart at the first place where the seat works hardest.
That is the practical answer to the question of leather seat crack filler durability. DIY products can handle hairline surface cracks and minor scuffs, especially on low-contact areas. They are much less predictable on the outer bolster, where body weight, friction, sweat, heat, and repeated entry and exit load the repair every day. A cheap kit may hide the damage. It does not automatically rebuild the flexibility or coating structure that made the seat durable in the first place.
What the filler is actually repairing
Automotive leather is not simply a thick sheet of colored hide. On most modern seats, the visible surface includes a protective finish, pigment, and sometimes a printed grain pattern over the leather itself. Cracks may begin in the coating before the hide underneath is seriously split. In other cases, the leather has dried, lost flexibility, and opened through several layers.
That distinction matters because filler is not a substitute for missing structure. It bridges a shallow gap, levels a rough edge, and gives the dye or paint a smooth surface to cover. Once cured, it needs to remain bonded while the seat bends around it. The compound must flex rather than form a rigid patch sitting on top of a moving surface.
A low-cost kit in the roughly $19–$50 range may contain a general-purpose leather and vinyl paste, adhesive, colorant, or a heat-cured compound. These products are convenient because they aim to cover several materials with one system. The compromise is that a formula broad enough for vinyl, coated leather, and small household repairs may not have the elasticity needed for a high-wear automotive bolster.
When the filler is too rigid, the failure usually starts at an edge. The surface bends, the repaired area resists, and the bond begins to lift. From there, flexing and friction turn a small lifted section into flaking, cracking, or peeling. The repair can look sound while the bond underneath is already failing.
A filler does not fail because the seat is “old” in some vague sense. It fails when the repaired layer cannot follow the physical movement of the layers beneath it.
Why seat bolsters are the hard case
The driver’s outer bolster is not a decorative panel. It is a working surface that receives a concentrated load every time we get in and out. The leather is compressed against the foam, dragged sideways by clothing, and flexed along the same crease again and again. A passenger seat may see less use, but its outer edge can still take substantial abrasion.
This is why a repair that survives on the center of the seat may fail on the bolster. The center section generally moves with the occupant, but it does not receive the same sideways scraping during entry and exit. A small crack in the rear seat, door insert, or side panel may remain stable for much longer than the same crack on the driver’s seat edge.
Heat adds another load. A parked cabin can become hot enough to soften coatings and accelerate movement between the leather, filler, dye, and clear topcoat. Cold conditions do the opposite, making some compounds less flexible. Repeated expansion and contraction does not need to be dramatic to matter. A repair can be stressed by hundreds of small cycles before any visible failure appears.
The original leather also has a grain and a surface finish designed to distribute wear. If we sand through that finish, fill a crack, and apply a smooth layer of paint, we may restore color while changing how the area handles friction. Grain stamping can improve the appearance, but it does not turn a thin repair into a factory-thick skin.
There are several common failure patterns:
1. Edge lifting: the filler remains attached in the middle but releases around the perimeter of the damaged area.
2. Surface flaking: the compound or color coat becomes brittle and breaks into small pieces under repeated flexing.
3. Peeling: a larger section loses adhesion because the surface was contaminated with oil, dressing, sweat, or residual cleaner.
4. Recracking: the repair remains bonded but the original leather continues to move or split beneath it.
5. Color loss: the filler is intact, but the dye or topcoat wears through from friction and exposes a mismatched surface.
These are different failures, and they point to different causes. Adding another layer of color will not solve a bond problem. More conditioner will not repair a rigid filler. A thicker patch may only create a stiffer island that cracks sooner.
Air-dry flexible filler versus heat-cured paste
The chemistry of the filler has more influence on durability than the kit’s packaging suggests. Air-dry elastomeric fillers are generally the better choice for automotive leather because they remain more flexible after curing. That flexibility allows the repair to bend with the seat rather than resisting every compression cycle.
Heat-cured systems can be attractive because they appear to harden quickly or promise a strong set. On automotive leather, however, the added heat can dry or scorch the material, and the resulting bond may be weaker under seat flex. A paste that feels firm to the touch is not necessarily a paste that will survive repeated bending.
| Repair system | Where it makes sense | Main durability concern | Practical expectation |
|---|---|---|---|
| Air-dry elastomeric filler | Hairline cracks, shallow surface damage, low- to moderate-wear areas | Still depends heavily on cleaning, abrasion, dye, and topcoat | Best DIY option when the underlying leather is sound |
| Heat-cured paste | Small repairs where the material and manufacturer instructions clearly support heat | Excess heat, weaker surface bond, reduced flexibility | Higher risk on automotive seats, especially thin or aged leather |
| Rigid leather/vinyl hybrid compound | Quick cosmetic work on minor scuffs or non-flexing trim | Cracking, flaking, and peeling under body weight | Usually short-lived on outer bolsters |
| Professional flexible filler with cross-linker | High-wear bolster repairs and larger cosmetic restoration | Requires better color matching and application control | More durable when preparation and coating are done correctly |
We should also separate the filler from the coating system. A neutral or single-color crack filler is only the middle layer. It normally needs a matching leather dye or paint above it, followed by a protective sealant. The topcoat carries much of the resistance to ultraviolet exposure, rubbing, and contamination. If the color layer is weak, the filler beneath it can remain sound while the repair still looks ruined.
Professional leather technicians may add a cross-linker to the paint and clear topcoat, particularly on high-wear bolsters. This improves chemical and abrasion resistance, but it is not a magic additive. A cross-linker cannot make contaminated leather clean, restore missing grain, or compensate for a filler that has already cured hard and brittle.
Preparation decides whether the repair bonds
Most failed DIY leather repairs are not defeated by the first coat of filler. They are defeated before the filler is applied.
Leather seats collect body oil, sunscreen, silicone dressing, sweat, dust, and cleaning residue. Some of these contaminants are difficult to see. They sit in the grain and create a weak boundary between the original coating and the repair. The filler may appear to wet the surface, yet it is bonding to a film of residue rather than to a properly prepared substrate.
Start with a suitable leather cleaner and work the damaged area until loose dirt and surface contamination are removed. The goal is not to soak the seat. Excess moisture can move into seams and foam, and aggressive scrubbing can widen a fragile crack. Work gradually, wipe away residue, and allow the area to dry completely.
After cleaning, the damaged coating normally needs to be feathered back. Fine sandpaper around #600 grit is commonly used to remove loose finish and smooth the perimeter of the crack. We are not trying to grind through the leather. We are creating a stable, lightly abraded surface with no curled coating edges for the new material to catch and lift.
For final surface cleaning, a 70% isopropyl alcohol solution may be used where the product system allows it. This step needs restraint. Alcohol can strip color and dry some finishes, so it should be applied to a cloth or controlled area rather than poured into the seat. If the existing coating is already fragile, a less aggressive compatible cleaner may be the safer route.
A sound preparation sequence looks like this:
- Remove dirt, oil, and old dressing from around the entire damaged area, not only from the visible crack.
- Trim or remove loose coating so the repair has a firm edge to meet.
- Sand lightly with fine grit, commonly around #600, to create adhesion without cutting deeply into the hide.
- Let the surface dry fully before filling; trapped cleaner or moisture weakens the bond.
- Apply thin layers rather than one heavy mass, allowing each layer to cure according to the product system.
- Rebuild texture only after the filler has leveled and cured.
- Apply matched color, then a compatible protective topcoat.
Thin layers matter because a thick application can cure unevenly. The outside may feel dry while the center remains soft. When the seat flexes, that soft core shifts and the surface begins to crease. A repair that is slightly lower but flexible is generally more useful than a proud, hard ridge.
The role of color, grain, and the clear coat
A crack filler is usually neutral or mono-colored. It is not designed to be the final visible finish. Some heavy fillers can be tinted, but the colorant addition should stay within the product’s stated limit; one commonly cited maximum is 10% for direct tinting of heavy filler. Beyond that, we may change the compound’s flexibility and curing behavior.
In most repairs, the filler is leveled first and the leather color is applied afterward. Matching automotive leather color is not as simple as choosing black, beige, or gray from a bottle. The original surface may have a warm or cool undertone, a slight sheen, and a grain pattern that breaks up reflections. A perfectly flat black patch can look newer and more obvious than a slightly imperfect color match that retains the surrounding texture.
Grain stamping can help with appearance, but it should be used with care. Pressing a pattern into uncured filler can disturb the bond or leave a heavy texture that catches clothing. The stamping material must be compatible with the filler, and the pattern should transition into the surrounding grain rather than stop at a sharp border.
Then comes the topcoat. This is where many home repairs lose durability. The color layer may be acceptable, but without a suitable sealant it remains vulnerable to friction, cleaners, and ultraviolet exposure. A clear coat also needs to remain flexible. A hard, glossy film over a moving seat can become the next failure plane.
Newly repaired leather should not be saturated with heavy oil or lanolin-based conditioner. These conditioners can soften or dissolve colorants and weaken the bond of the filler. That does not mean leather should never be conditioned. It means the timing and product chemistry matter. A fresh repair needs to finish curing and should receive only products known to be compatible with the dye and topcoat.
How long does leather repair paste last?
There is no honest universal lifespan for a DIY repair. The same kit can behave differently on two vehicles because the seat position, climate, material, and entry technique are different. The known range is broad: cheap rigid systems may begin to crack, flake, or peel within weeks to months on high-wear areas, while a properly prepared flexible repair can remain useful considerably longer.
That is not a promise of permanence. It is a description of the variables doing the work.
The biggest influences on cracked leather car seat repair lifespan are:
- Location: a driver’s outer bolster is far more demanding than a rear-seat side panel.
- Movement: frequent sliding across the bolster shears the repair at its edges.
- Material: genuine leather, coated leather, and faux leather do not respond identically to the same filler.
- Condition underneath: a repair cannot stabilize leather that is deeply split, excessively thin, or separating from its backing.
- Preparation: oils and loose coating reduce adhesion before the compound ever cures.
- Filler flexibility: elastomeric air-dry systems generally tolerate movement better than rigid or heat-cured pastes.
- Topcoat quality: weak dye or clear coat can wear away even when the filler remains bonded.
- Climate: heat cycling and cold stiffness change how the layers move.
- Maintenance: harsh cleaners and heavy oil treatments can shorten the life of the finish.
If the damage is a shallow surface crack and the leather beneath still has strength, a DIY repair can be a reasonable cosmetic intervention. If the crack is wide, the hide is torn, or the bolster has collapsed and exposes a hard edge, filler alone is being asked to do structural work it was not made to do.
On a high-wear bolster, the repair’s life is governed less by the label on the jar than by how many times the seat is forced to bend against the repaired edge.
Where DIY repair makes sense—and where it does not
DIY filler is most defensible when the damage is limited and the surrounding material is stable. We can clean, abrade, fill, recolor, and seal a small area without rebuilding the entire seat. The result may not be invisible at close range, but it can stop a minor cosmetic defect from becoming more ragged.
It is a weaker proposition when the leather is failing across a broad section. Multiple cracks close together often indicate that the coating or material has lost flexibility more generally. Filling each line may produce a patchwork surface that continues to move and break around the edges. In that situation, a larger restoration or replacement panel may be more sensible than repeating small repairs.
Nubuck and suede deserve separate treatment. Standard acrylic or leather filler systems are not automatically compatible with these surfaces. Their nap, absorbency, and finish are different, and a conventional filler can permanently flatten or contaminate the texture. We should not treat a suede seat as ordinary coated automotive leather simply because both are described as leather.
Faux leather and vinyl also need material-specific care. Some products are designed for both, but that does not mean the repair will behave identically on each substrate. Vinyl may have a different backing and stretch pattern; coated leather may move differently as the hide flexes. The product instructions and a hidden-area test matter more here than a generic claim that the kit works on everything.
Before committing to the visible seat, test the full sequence on an inconspicuous section or a spare scrap with a similar finish. That test should include cleaning, sanding, filler, color, and topcoat. A filler that looks excellent before sealing may darken, flatten, or change sheen afterward.
Making a repair last longer
The best way to improve leather seat crack filler durability is to reduce the forces that caused the failure. That begins with entry and exit. If we can lower ourselves into the seat instead of dragging across the outer bolster, the repair sees less shear. It is a small change, but it is repeated every time the vehicle is used.
Keep the seat clean without stripping it. Dirt trapped in the grain acts like a fine abrasive, while aggressive solvent use can remove the protective finish. Use a compatible cleaner, soft agitation, and controlled drying. Avoid applying heavy dressing directly to a fresh repair, especially when the product contains lanolin or concentrated oils.
Sun exposure also matters. Parking in shade, using a suitable windshield sunshade, or protecting the cabin from prolonged direct heat reduces the number of severe temperature cycles. None of this reverses worn leather, but it slows the movement and drying that make a repaired area work harder.
When the repair begins to show a narrow edge or a small change in sheen, deal with it early. A minor topcoat touch-up is less invasive than waiting until the coating peels across the entire bolster. Do not keep adding filler over a contaminated or lifting surface. Stop, remove the unstable material, clean the boundary, and rebuild the layers.
Storage also affects the compound before application. Many filler products specify storage between about 8°C and 30°C. Material that has been frozen, overheated, or left partially open may not cure or flex as intended. The jar can look usable while the chemistry has already changed.
The durable answer is often a system, not a paste
The phrase “leather repair paste” makes the job sound like filling a hole in a wall. A seat repair is closer to rebuilding a thin, flexible coating system on a moving substrate. The filler levels the defect. The dye restores color. The sealant carries much of the abrasion and chemical resistance. The underlying leather provides the movement and strength. If one layer is wrong, the others cannot fully rescue it.
For a small crack on stable leather, an air-dry flexible filler, careful #600-grit preparation, compatible color, and a proper topcoat give us the best chance of a lasting result. A cross-linker in the paint and clear coat can improve resistance on a heavily used bolster when the products are designed to work together.
For a broad, brittle, or structurally damaged area, durability comes from removing the failing surface or replacing the affected section—not from applying a thicker coat of the same paste. That is the point where professional restoration earns its cost. It addresses the material underneath instead of disguising the symptom for another short interval.
A DIY repair can be useful, but we should judge it by the forces it must survive. If the seat flexes, the repair must flex. If the surface is contaminated, it must be cleaned before it can bond. If the color is exposed to friction, it needs a protective finish. And if the leather itself has lost its strength, no small jar of filler can put that structure back.
The long-term result is decided at the workbench, before the first visible coat goes on. We either prepare a surface that can hold a flexible repair, or we build a clean-looking failure that will eventually peel along the same edge where the original crack began.