Pressure vs vacuum brake bleeding: which method is best?
A brake system’s hydraulic circuit operates on a single, unforgiving principle: brake fluid is effectively incompressible, while air is not.
Merritt Vane·Updated: August 12, 2026·18 min read
Even a small pocket of vapor in the line between the master cylinder and the caliper gives the pedal a spring-like quality. Instead of transmitting the driver’s effort directly to the pistons, the system first compresses the trapped gas. The result is the familiar soft or sinking pedal.
Compare car rental deals in United Kingdom
See available offersPartner link — DiscoverCars comparisonThe purpose of bleeding—whether by pressure, vacuum, or gravity—is to move old fluid and compressible air out of the hydraulic circuit without allowing a new pocket of air in. The methods share that goal, but they create flow in different ways and expose the mechanic to different risks.
Two single-person methods dominate the DIY discussion: pressure bleeding and vacuum bleeding. Pressure bleeding pushes fluid from the master-cylinder reservoir toward the open bleeder screw. Vacuum bleeding creates a low-pressure point at the wheel, so fluid is drawn from the reservoir and master cylinder through the same circuit toward that bleeder screw. The overall hydraulic route does not reverse; what changes is the source of the pressure difference.
That distinction matters when choosing between the two. Pressure bleeding is usually the more controlled method for a complete fluid flush, especially when the vehicle’s service procedure calls for a pressurized reservoir or a scan-tool-assisted ABS routine. Vacuum bleeding is often faster and more convenient for a localized repair. Neither method is automatically correct for every import, every ABS system, or every type of brake work.
The Mechanics of Push vs. Pull: How Each System Functions
A pressure bleeder is essentially a sealed tank connected to the master-cylinder reservoir through a vehicle-specific cap. The tank holds fresh brake fluid, while a hand pump or compressed-air source pressurizes the space above it. Once the bleeder screw is opened, pressure on the reservoir fluid pushes it through the master cylinder, hard lines, flexible hoses, and caliper or wheel cylinder before it exits into a catch bottle.
The key advantage is continuity. If the pressure bleeder contains enough fluid and the connection remains sealed, the master-cylinder reservoir is being supplied while the old fluid leaves at the wheel. The operator does not have to keep pumping the brake pedal, and there is no repeated release of the master-cylinder piston that could disturb an already worn seal.
A vacuum bleeder works from the other end of the circuit. A hand pump or shop vacuum is connected to the bleeder screw at the caliper or wheel cylinder. When the tool lowers the pressure at that point, the higher pressure in the open master-cylinder reservoir pushes fluid through the master cylinder and brake lines toward the low-pressure point. The fluid still travels from the reservoir to the wheel bleeder—the same general direction it follows during normal hydraulic operation. The vacuum tool changes the pressure source, not the plumbing.
That distinction is more than a technical correction. It explains why a vacuum bleeder can draw fluid through a line even though it is attached at the caliper, and why an empty reservoir remains a serious problem. The tool may continue pulling at the wheel while the master cylinder quietly runs dry. Once air enters through the reservoir inlet, the job is no longer limited to the corner being serviced.
Gravity bleeding is the third method worth keeping in the picture. With the reservoir filled and a bleeder screw opened, fluid slowly moves down the circuit under its own weight. Gravity bleeding is gentle and can be useful when replacing fluid gradually or allowing a small amount of air to rise out of a short, uncomplicated section. It is also slow, and it does not provide the same active control over fluid movement as pressure or vacuum equipment.
All three methods still depend on the correct bleed sequence. Many vehicles specify the wheel furthest from the master cylinder first, but that is not a universal rule. Some diagonally split systems, linked braking systems, and manufacturer-specific ABS procedures use a different order. The workshop manual for the exact chassis should take priority over a generic “farthest to nearest” sequence.
| Parameter | Pressure bleeding | Vacuum bleeding | Gravity bleeding |
|---|---|---|---|
| Pressure source | Positive pressure at the master-cylinder reservoir | Low pressure at the open wheel bleeder | Fluid head and gravity |
| Normal fluid route | Reservoir to master cylinder, then to wheel bleeder | Reservoir to master cylinder, then to wheel bleeder | Reservoir to master cylinder, then to wheel bleeder |
| Reservoir condition | Sealed to a supply tank or pressure cap | Open and monitored by the mechanic | Open and monitored by the mechanic |
| Best suited to | Full flushes and multi-corner work | Local repairs and one-corner bleeding | Slow fluid replacement and simple systems |
| Main risk | Excessive pressure or an adapter leak | False bubbles and reservoir starvation | Very slow flow or failure to move trapped air |
| One-person operation | Yes | Yes | Usually, although supervision is still required |
The method is only one part of the result. A properly sealed pressure adapter can produce a poor bleed if the pressure is excessive. A vacuum pump can work well on a single caliper if the threads are sealed and the reservoir is watched continuously. Good technique matters as much as the label on the tool.
Why Pressure Bleeding Is the Gold Standard for Full Fluid Flushes
A complete brake-fluid service is more than opening each bleeder until the fluid looks clean. The mechanic is trying to replace fluid throughout the hydraulic volume: in the master cylinder, hard lines, flexible hoses, calipers or wheel cylinders, proportioning hardware, and—depending on the vehicle—parts of the ABS or electronic stability-control modulator.
Old fluid can darken from heat and contamination, while water absorbed over time lowers its resistance to high temperatures. Fresh fluid at the caliper does not necessarily mean the entire circuit has been flushed. The aim is to establish a controlled flow and continue until the fluid leaving each relevant circuit is clean and free of visible air.
Pressure bleeding is generally preferred for this work because it supplies fluid continuously from the reservoir. The mechanic can move from corner to corner without repeatedly opening the master-cylinder reservoir or relying on a pedal-pumping assistant. The positive supply also makes it easier to maintain a fluid column through long lines and to avoid drawing the reservoir below its inlet.
That does not make pressure bleeding the only viable method. A careful gravity bleed or vacuum bleed can also move a substantial amount of fluid through a system, provided the reservoir is kept full and the procedure matches the vehicle’s service requirements. The practical difference is that pressure equipment makes continuous supply and controlled flow easier to maintain, particularly during a multi-corner flush.
Pressure bleeding is usually the most controlled choice for a complete flush, but the real protection against air entry is continuous monitoring of the reservoir and strict adherence to the vehicle’s procedure.
A pressure bleeder also gives the operator a more stable flow than pedal pumping. With manual bleeding, the pedal must be pressed and released in coordination with the person at the wheel. With vacuum bleeding, the flow can fluctuate as the pump loses vacuum or as air leaks around the bleeder screw threads. A pressure system can provide a steady stream while the mechanic observes the fluid, checks for contamination, and closes the screw before releasing pressure.
There is one important qualification for ABS-equipped imports. The presence of an ABS modulator does not automatically mean a scan tool is required for every fluid change. Some systems can be flushed through the wheel circuits using the manufacturer’s ordinary sequence. Others specify an ABS or electronic stability-control bleed routine that cycles valves and pumps, sometimes using a scan tool and sometimes requiring additional steps.
If the service information calls for ABS actuation, that step should be performed when appropriate. Cycling the modulator can move fluid through internal passages that may not exchange completely during a normal wheel-bleeding operation. But the exact requirement is vehicle-specific: it depends on the hydraulic layout, the modulator design, the repair performed, and the manufacturer’s procedure. It is not accurate to say that dormant air in every ABS unit will remain trapped unless the pump is commanded to cycle, nor that every complete flush requires electronic activation.
The same caution applies after component replacement. Replacing a caliper may introduce air only into a limited section of the circuit. Opening the master cylinder, removing an ABS unit, replacing a brake line, or allowing the system to drain completely can create a different problem. If the workshop manual specifies bench bleeding, pressure bleeding, a scan-tool routine, or a particular sequence, follow that instruction rather than applying a general rule from another vehicle.
The Convenience and Limitations of Vacuum Bleeding for Localized Repairs
A vacuum brake bleeder is at its best when the job is small, localized, and accessible. Replacing one caliper, changing a short flexible hose, servicing a wheel cylinder, or clearing air from a recently opened corner can often be handled without a pressure tank or a second person.
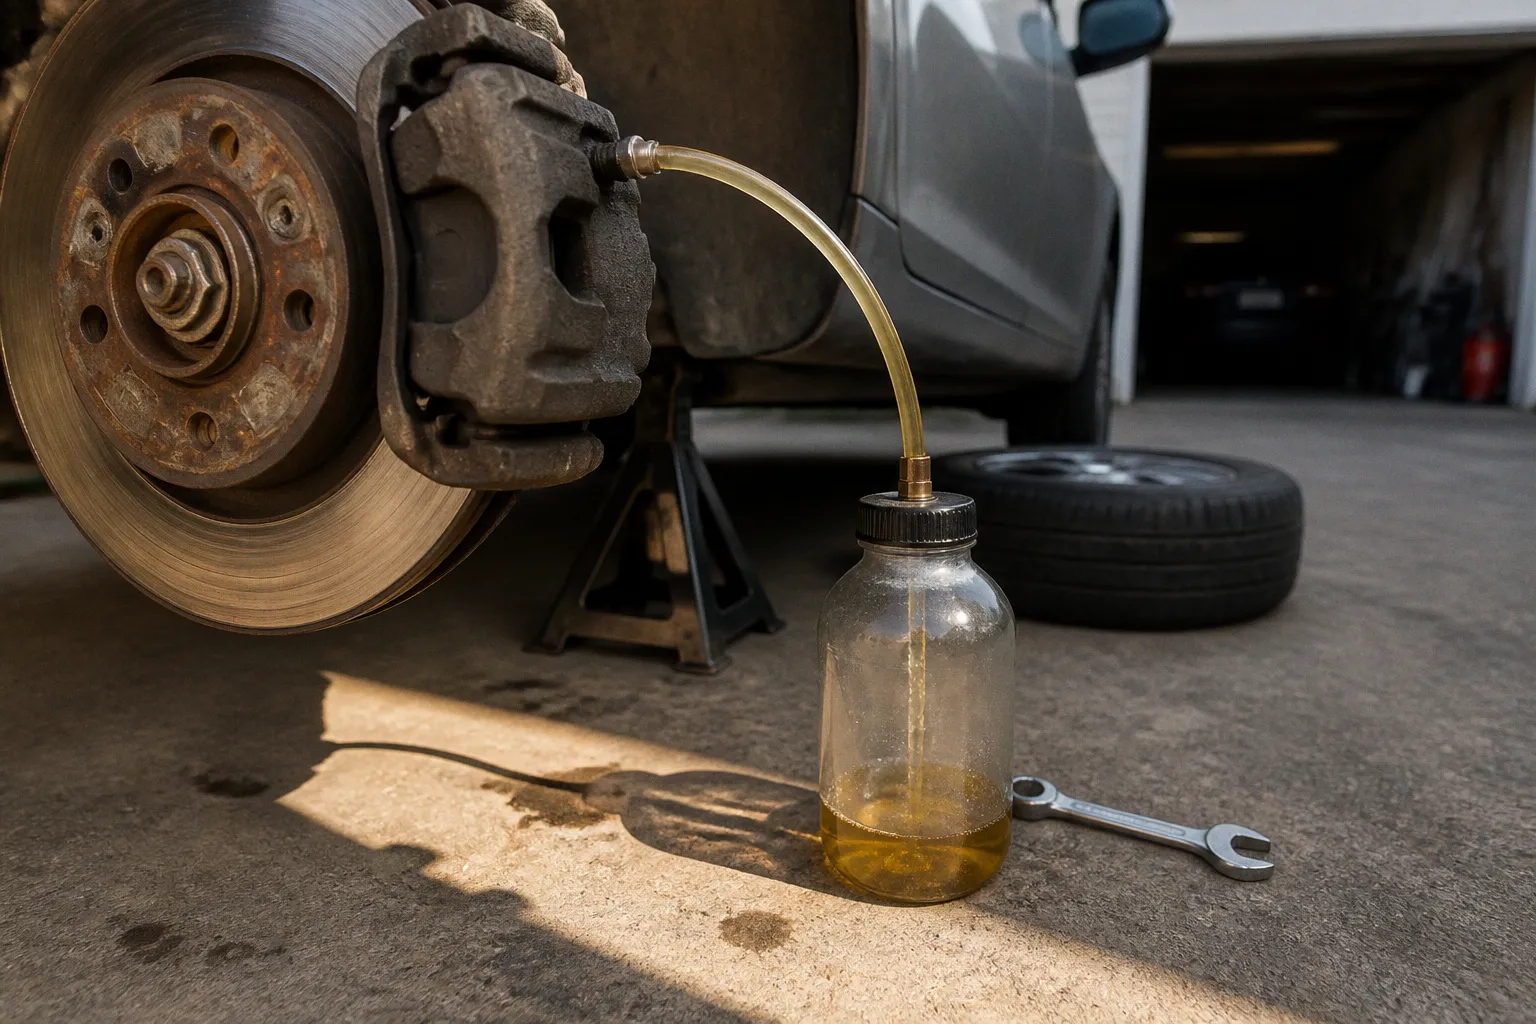
The tool connects to the bleeder screw with a clear hose and a rubber adapter. When the pump creates a partial vacuum, fluid moves from the master-cylinder reservoir through the affected circuit and into the catch container. The mechanic can see the flow and stop once the fluid is clean and the bleeding procedure has been completed.
For a single-corner repair, that simplicity is valuable. There is no need to find the correct pressure cap for an unusual reservoir, and the equipment is inexpensive compared with a professional pressure-bleeding kit. A hand pump also fits into a tool bag more easily than a pressurized tank.
The limitations appear when the repair becomes a full-system service. The catch jar is small, the flow can be slow, and the master-cylinder reservoir remains open. It must be checked repeatedly, not just at the beginning and end. The operator should stop before the fluid level approaches the inlet port, refill with the correct new fluid, and continue only after confirming that no dirt or incorrect fluid has entered the reservoir.
Vacuum bleeding can also make the system look worse than it is. Air may be pulled past the bleeder screw threads and appear as a steady stream of bubbles in the hose. That does not prove that the hydraulic circuit still contains the same amount of air. Conversely, it does not prove that the circuit is completely free of air, because thread leakage and genuine hydraulic air can occur at the same time.
A useful way to think about the vacuum method is as a fluid-moving tool, not a perfect air-content detector. It can pull new fluid through a line, but the bubbles in the hose need to be interpreted alongside pedal feel, the condition of the fittings, the repair history, and the vehicle’s specified procedure.
For localized work, the following habits make the method considerably more reliable:
- Keep the reservoir above its minimum level at all times, and check it often rather than relying on the amount in the catch jar.
- Seat the hose firmly on the bleeder screw and use an adapter that seals against the screw’s nipple.
- Protect painted surfaces from brake fluid before opening the system.
- Crack the bleeder screw only enough to establish flow; opening it too far can make thread leakage worse.
- Close the screw before removing vacuum from the hose, then verify the final torque and check for seepage.
- Do not judge completion from bubbles alone. Confirm that the fluid is clean, the pedal is firm, and the vehicle’s prescribed sequence has been followed.
If the bleeder screw is corroded, rounded, or difficult to open, the choice of bleeding method is secondary. Forcing it can break the screw or damage the caliper. A seized bleeder may call for replacement, heat applied with appropriate care, or professional service rather than a stronger vacuum pump.
Navigating Pressure Limits and Avoiding ABS System Damage
Pressure bleeding is controlled bleeding, not high-pressure washing. The equipment should be operated within the vehicle and tool manufacturer’s limits. Many passenger-car systems are serviced in the broad range of 10 to 20 psi, but that range is a working reference, not a universal specification. Some manufacturers authorize a different pressure for a particular model or procedure, and some aftermarket adapters are not designed for the same load as professional equipment.
The correct pressure is the lowest level that produces a steady, usable flow through the open bleeder. Excessive pressure does not automatically remove air more effectively. It increases the load on the reservoir cap, adapter seal, master-cylinder reservoir, hoses, and internal seals. A leak at the cap can spray fluid into the engine bay; a damaged gasket can allow air to enter; and an adapter that shifts under pressure can turn a controlled service into a cleanup job.
Some BMW service procedures, for example, may specify pressure around 2 bar for particular fluid-replacement routines. That should be treated as a model- and procedure-specific instruction, not as a general target for every BMW or every import. The exact workshop manual remains the authority, especially on vehicles with unusual reservoir designs or integrated hydraulic and electronic systems.
A sensible pressure-bleeding routine is deliberately unhurried:
1. Inspect the reservoir, cap, bleeder screws, hoses, and adapter before adding fresh fluid. Existing leaks should be repaired first.
2. Confirm that the pressure cap fits correctly and that its seal is clean. A universal cap that only partly grips the filler neck is not a safe substitute for a proper adapter.
3. Perform a low-pressure leak check before filling the system with fresh fluid. Watch the cap, hose connections, and tank fittings.
4. Add the specified fluid and pressurize gradually. Do not begin by pumping to the highest number marked on the gauge.
5. Open one bleeder at a time and allow the stream to stabilize. Keep the pressure within the permitted range.
6. Close the bleeder before depressurizing the tank, then inspect the fitting for seepage.
7. Finish with the manufacturer’s pedal, leak, and ABS checks.
Do not confuse the pressure used to move fluid during bleeding with the much higher hydraulic pressure generated when the brake pedal is applied. The fact that a braking system can produce substantial line pressure in operation does not mean its reservoir, cap, or ABS components should be exposed to arbitrary shop pressure during service.
ABS units deserve particular care because they combine hydraulic passages with electrically controlled valves, pumps, and accumulators. A pressure bleeder used correctly is not inherently dangerous to an ABS unit, but an incorrect pressure, wrong adapter, contaminated fluid, or incorrect cycling procedure can create problems. If the manual calls for a scan tool, use it. If it prohibits a particular bleeding technique, do not assume that a generic DIY method is close enough.
Reservoir starvation is also a technique issue rather than a property that belongs exclusively to one method. A pressure tank reduces the chance of running the master cylinder dry because it can supply fluid continuously, but the tank can be emptied or connected incorrectly. Gravity and vacuum bleeding require more frequent manual checks, yet careful monitoring can prevent the same failure. Once air has entered the master cylinder, additional bleeding may be required, and the apparent “single-corner” repair can become a complete system bleed.
The False Air Phenomenon: Troubleshooting Vacuum Bleeder Misconceptions
The most persistent misunderstanding about vacuum bleeding concerns the bubbles in the transparent hose. A mechanic opens the bleeder screw, starts pumping, and sees a mixture of fluid and air. After several strokes, the stream may become clearer, but small bubbles can continue to appear. It is tempting to conclude that the brake line is still full of air.
Sometimes it is. But the bubbles may also be entering around the bleeder screw threads. The screw seals the hydraulic passage at its seat or tip; its threads are not always an airtight seal when a vacuum is applied from the outside. A vacuum tool can therefore draw air past the threads and into the hose. The bubbles then travel through the same transparent line as genuine air released from the hydraulic circuit.
This is why a vacuum bleeder is not a flawless diagnostic window. Thread leakage can create misleading bubbles, but it would be equally wrong to declare every bubble “false.” Real air may be present in the line at the same time, especially after a caliper, hose, wheel cylinder, or brake pipe has been opened. The supplied stream of bubbles establishes that air is entering the hose; by itself, it does not establish exactly where every bubble originated.
The best response is to reduce the possibility of external air entry and then reassess. A small amount of thread sealant approved for brake-bleeder use can help in some applications. PTFE tape must be used with caution: it should never cover the bleeder’s fluid passage, shed material into the system, or interfere with the screw seating correctly. Some bleeder screws or aftermarket designs use a sealing arrangement that should not be modified at all. The vehicle or component manufacturer’s guidance takes priority.
Other practical checks can help separate the two sources:
- Compare the bubble pattern with the pump disconnected. If the hose or adapter itself leaks, the tool may be drawing air from a loose connection.
- Keep the hose rising continuously toward the catch jar where possible. A low loop can hold pockets that look like ongoing system air.
- Open the bleeder slightly rather than several turns. Excessive opening gives air more opportunity to pass through the threads.
- Check whether the fluid level is falling at the reservoir. A falling level confirms fluid movement, but it does not by itself confirm that all air has been removed.
- After bleeding, close the screw, clean the area, and inspect for fluid seepage while an assistant applies moderate pedal pressure.
- Evaluate the pedal after the vehicle is reassembled and stationary. A firm pedal with no leaks is more meaningful than a perfectly bubble-free hose during vacuum pumping.
If the hose remains full of bubbles even after the connections and bleeder threads have been addressed, stop treating the bubbles as a cosmetic nuisance. Inspect the bleeder screw seat, the caliper casting, the hose connection, and the master-cylinder reservoir. A cracked fitting or loose hose can admit air and leak fluid. In that situation, changing from vacuum to pressure may alter the visible symptom without repairing the fault.
The final pedal check also matters. A soft pedal can come from air, excessive pad-to-rotor clearance, a caliper installed on the wrong side with the bleeder below the trapped air, a flexible hose problem, rear drum adjustment, or a failing master cylinder. Bleeding should not become an automatic response to every low pedal.
Choosing the Right Method for the Job
The comparison commonly described as pressure bleeding vs vacuum bleeding brakes is really a comparison between control and convenience.
For a complete fluid flush, pressure bleeding is usually the stronger choice. It maintains a supplied reservoir, gives a stable flow, works well for moving fluid through multiple circuits, and is compatible with many manufacturer procedures for modern import vehicles. It also reduces the likelihood of reservoir starvation, although the tank still has to be monitored and the connection still has to be secure.
For a single-corner repair, a vacuum bleeder can be the faster tool. It is inexpensive, portable, and practical when there is no room for a second person at the pedal. It is especially useful after replacing one caliper or flexible hose, provided the reservoir remains full and the mechanic understands that bubbles around the bleeder threads can be misleading.
Gravity bleeding remains appropriate when the system allows fluid to move readily and time is not a concern. It is the least aggressive method, but also the least forceful. A stubborn air pocket, a long line, or a vehicle with a specified ABS bleeding sequence may require something more deliberate.
The answer to “what is the best way to bleed brakes alone?” therefore depends on the repair:
- Choose pressure bleeding for a multi-corner fluid flush when the correct cap and vehicle procedure are available.
- Choose vacuum bleeding for a localized repair when access is good and the reservoir can be watched continuously.
- Use gravity bleeding when a slow, uncomplicated fluid exchange is acceptable and the system’s manual permits it.
- Use a scan tool or professional service when the manufacturer requires ABS or stability-control actuation that the available equipment cannot perform.
- If the pedal remains soft after a careful bleed, diagnose the mechanical system instead of repeatedly forcing more fluid through it.
The vacuum brake bleeder vs. manual pedal method debate has a similar answer. A hand pump can make a one-person job practical, while manual bleeding can provide a stronger, more familiar flow when a second person is available. Neither method compensates for a loose fitting, a damaged bleeder screw, an empty reservoir, or an incorrect sequence.
Brake bleeding rewards restraint. Pressurize only as far as the procedure allows. Do not chase every bubble in a vacuum hose without checking for thread leakage. Do not assume every ABS unit needs the same cycling routine, and do not assume that one method is the only method capable of keeping the reservoir supplied.
The hydraulic circuit does not care whether the fluid was pushed from above or drawn from below. It cares that the correct fluid reaches every required passage, that air is not introduced during the process, and that the final pedal is firm with no leaks. Choose the method that gives you the best control for the specific repair, follow the vehicle-specific instructions, and verify the result before the car returns to the road.