Torque wrench calibration: how often is it needed?
A torque wrench can click cleanly, feel normal in your hand, and still be wrong. The error may be small enough to escape notice on a wheel fastener, then large enough to matter when we are tightening…
Judson Grier·Updated: August 16, 2026·19 min read
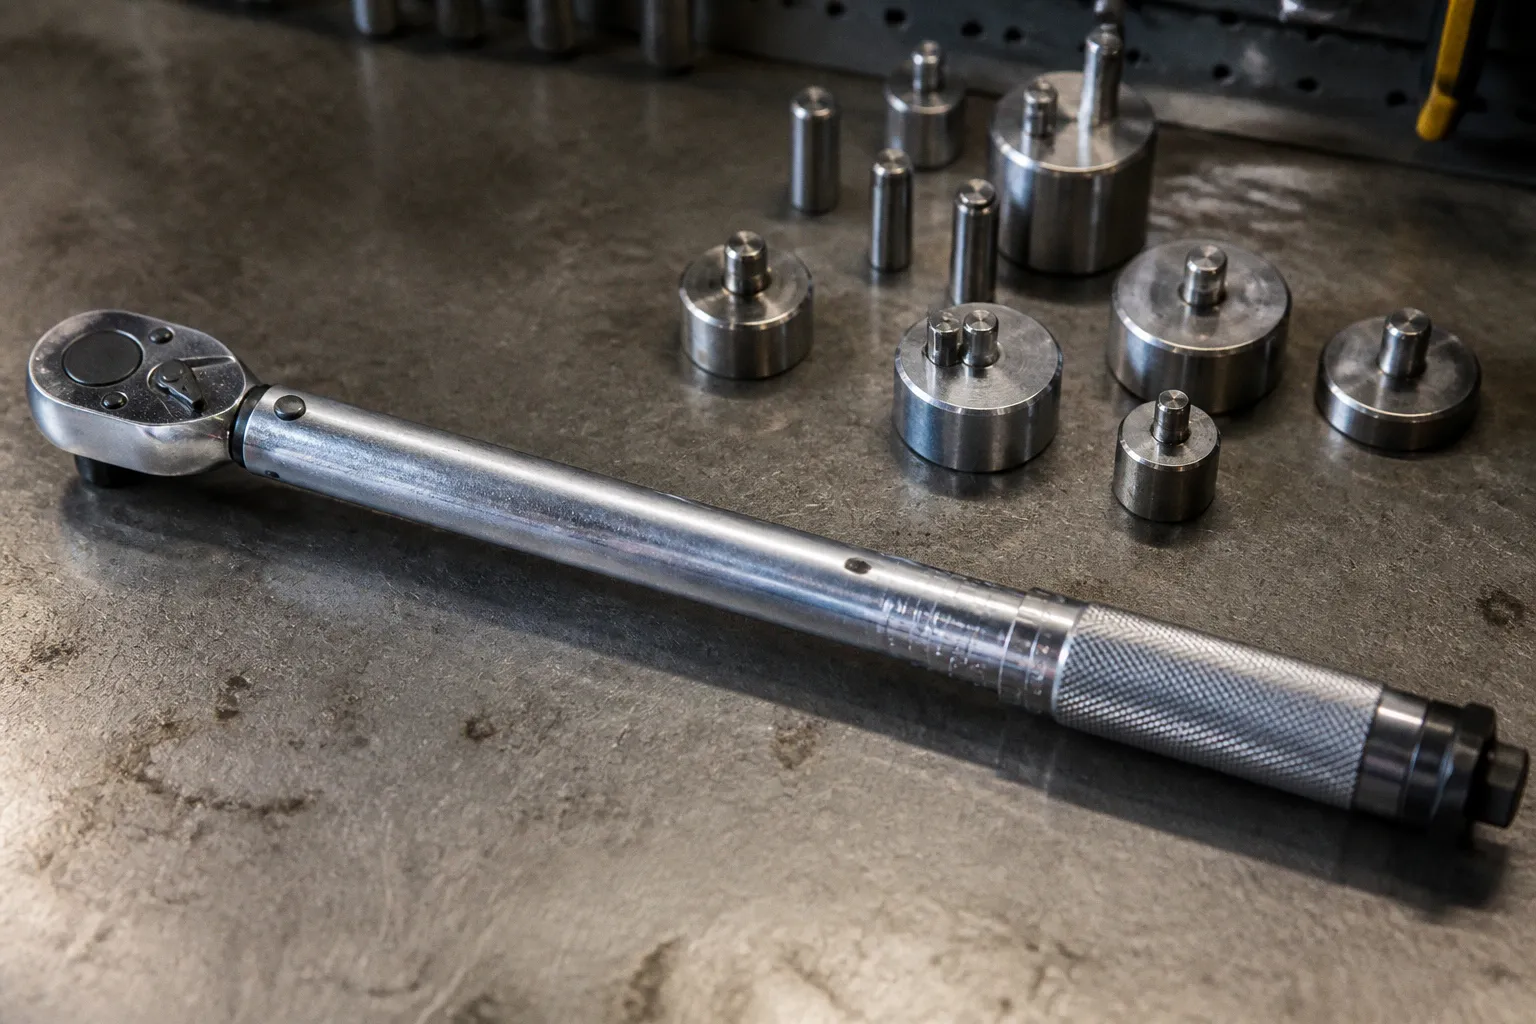
A torque wrench can click cleanly, feel normal in your hand, and still be wrong. The error may be small enough to escape notice on a wheel fastener, then large enough to matter when we are tightening an aluminum housing, a cylinder-head fastener, a spark plug, or a drain plug with a narrow torque range.
That is the trouble with torque tools: the failure is usually invisible. A socket does not slip. The bolt does not necessarily strip. Nothing announces that the wrench released at the wrong load. We only discover the problem later, when a joint loosens, a thread pulls out, a seal begins to seep, or a clamped component distorts.
For a home garage, the useful question is not simply whether torque wrench calibration is needed. It is how often the tool should be calibrated, how storage and use affect it, and where a home verification test stops being good enough for safety-critical work.
The practical baseline is straightforward: ISO 6789 recommends testing torque tools every 12 months or after 5,000 cycles, whichever comes first. For occasional home use, a 12- to 24-month interval is commonly reasonable, with an earlier check before major critical repairs. A wrench that has been dropped, overloaded, or exposed to severe conditions moves into a different category: it needs inspection and recalibration before we trust it again.
Calibration is not the same as a reassuring click
A click-type torque wrench works through a spring-loaded mechanism. When we set the handle to a target value, we increase or reduce spring tension. As the applied torque reaches the release point, the mechanism trips and the handle moves slightly with the familiar click.
That movement is not the torque itself. It is only the mechanism telling us that its internal threshold has been reached.
Over time, several things can shift that threshold:
- The spring can lose accuracy if it remains compressed for long periods.
- The release mechanism can wear, bind, or collect contamination.
- The handle scale can be read incorrectly or become difficult to align.
- The tool can be overloaded by using it as a breaker bar.
- A hard drop can alter the internal geometry without leaving an obvious mark.
- Heat, moisture, and poor storage can affect lubrication and internal components.
The spring is the part that deserves particular attention. If a mechanical click wrench is stored at a high setting, the spring remains under tension. That does not guarantee immediate failure, but it creates unnecessary stress during the months when the tool is doing no work.
After use, we should return a conventional click wrench to its minimum scale setting, unless the manufacturer specifies another storage position. Do not wind it below the lowest marked value. The aim is to relieve the working spring tension, not to force the adjuster against its stop.
A torque wrench does not become trustworthy because it clicks. It becomes trustworthy when its release point has been verified under a known load.
Digital torque tools behave differently but are not immune to drift. Their sensors and electronics can offer tighter stated tolerances—often around ±1% to ±2%, compared with approximately ±4% for many standard mechanical click wrenches—but the display does not make the measurement automatically correct. A digital wrench can be dropped, overloaded, stored badly, or simply move outside its calibration tolerance.
The torque wrench calibration frequency for a home garage
For a professional or industrial shop, the tool may see thousands of cycles, repeated high-load work, temperature changes, and rough handling. In that environment, an interval of 3 to 6 months or roughly 2,500 to 5,000 cycles may be appropriate, depending on the manufacturer’s guidance and the shop’s quality system.
A home garage usually operates under less severe conditions. We may use the wrench for wheel fasteners, brake work, suspension components, spark plugs, drain plugs, and occasional engine repairs. The number of cycles is lower, but the consequences of an incorrect setting can still be serious.
A sensible schedule looks like this:
| Use and condition | Practical calibration approach |
|---|---|
| Occasional home use, careful storage | Verify periodically and arrange professional calibration about every 12–24 months |
| Frequent home use or regular repair work | Use the 12-month ISO-based interval as the safer reference |
| Professional or high-volume shop use | Consider 3–6 months or 2,500–5,000 cycles, following the tool and shop requirements |
| Tool dropped on concrete or another hard surface | Stop relying on it until it has been checked or recalibrated |
| Tool overloaded beyond its maximum range | Treat it as suspect and have it inspected |
| Major safety-critical repair after long storage | Verify the wrench before use, even if the calendar interval has not expired |
The calendar is only half of the decision. Usage severity matters more than ownership. A wrench that sits in a dry toolbox for eleven months and is used carefully a few times may experience less wear than one used every weekend as a general-purpose lever.
The other point is that calibration is not a one-time repair that gives the tool permanent authority. A calibration certificate describes the tool’s performance at the time it was tested. The next hard impact, overload, or period of neglect begins a new wear cycle.
What ISO 6789 testing actually tells us
ISO 6789:2017 provides a framework for testing hand torque tools. One useful detail is that testing covers multiple parts of the wrench’s capacity rather than only one convenient setting. The commonly referenced points are 20%, 60%, and 100% of maximum scale capacity.
That matters because a wrench can behave acceptably near the middle of its range and become less accurate near the bottom or top. If a tool is rated from 20 to 200 Nm, testing only at one setting does not tell us how it behaves across the rest of the scale.
This is also why choosing the right wrench matters before calibration enters the discussion. A 200 Nm wrench is a poor instrument for repeatedly setting a small 12 Nm fastener. Even if the stated tolerance is respectable, the low end of a large-capacity tool is not where we want to perform delicate work.
For import vehicles, this comes up often. One repair may require a low-range wrench for small fasteners and another may call for a higher-range tool for wheel or suspension work. Trying to make one broad-range wrench cover every job usually gives us a compromise at one end of the scale.
The manufacturer’s tolerance should be read as a limit, not a promise of perfection. A mechanical wrench with a stated accuracy of ±4% could release above or below the selected value within that range. At 100 Nm, that represents a possible difference of several newton-metres. Whether that matters depends on the fastener, the joint design, the material, and the service procedure.
For a critical fastener on an engine or braking system, we should not casually interpret a tolerance band as permission to guess. We use a correctly ranged tool, follow the vehicle manufacturer’s torque specification, and verify the tool when its history is uncertain.
How to check torque wrench calibration at home
A home test can tell us whether a wrench is behaving badly. It is not automatically equivalent to laboratory calibration, and it should not be presented as a certificate of compliance. The quality of the result depends on the accuracy of the known weight, the measurement of the lever arm, the way the load is applied, and the condition of the test setup.
The basic relationship is simple:
Torque = force × distance
If a known force is applied at a known distance from the center of the drive square, we can calculate the expected torque. In a weight-based test, the force comes from the weight under gravity. The distance must be measured from the center of the square drive to the point where the load acts—not from the end of the handle unless that is also the exact load point.
A controlled home verification usually involves:
1. Securing the drive end without loading the ratchet mechanism sideways.
The wrench should be supported in a way that allows the handle to move through its working arc while keeping the applied force aligned with the intended torque direction.
2. Measuring the effective lever length.
Use a straight reference from the center of the drive square to the load point. If the handle is extended or an adapter changes the load geometry, the effective distance changes with it.
3. Applying a known mass at a marked point.
The load should hang or act steadily rather than being jerked into place. Sudden loading can make the mechanism trip early and gives us a poor reading.
4. Repeating the test several times.
One click can be a fluke caused by friction or an inconsistent setup. Repeated readings at the same setting are more useful than a single result.
5. Testing more than one setting.
A wrench can be close at one point and wrong elsewhere. If practical, check a low, middle, and higher setting within the tool’s usable range, while staying away from the extremes if the home setup cannot apply the load safely.
6. Comparing the result with the manufacturer’s tolerance.
Do not invent a pass/fail threshold from the test alone. Use the tolerance specified for that tool, and remember that measurement error in the home setup may be large enough to hide a problem.
The test should be performed with the wrench in its normal torque direction. A reversible ratchet mechanism may work in both directions, but the manufacturer may specify calibration for only one direction or may require a particular orientation. We should follow the tool’s instructions rather than assume that reversing the ratchet changes nothing.
A simple calculation
Suppose the effective distance from the drive-square center to the load point is 0.5 metres, and the applied force is equivalent to 100 newtons. The expected torque is:
0.5 m × 100 N = 50 Nm
The calculation is clean. The real-world test is not. We still have to account for the accuracy of the mass, the distance measurement, the load alignment, the support friction, and whether the load is acting at the point we think it is.
That is why a home test is best treated as a verification screen:
- If the wrench is dramatically wrong, we have found a reason to stop using it.
- If readings vary widely from one repetition to the next, the mechanism or test setup needs attention.
- If results are close but the repair is safety-critical, professional calibration remains the better choice.
- If the wrench has suffered a known impact or overload, a reassuring home result does not erase that history.
A purpose-built torque tester can reduce some of the uncertainty. A DIY torque wrench calibration tester may use a load cell or another calibrated measuring device, but the tester itself must be accurate and correctly set up. Otherwise we have simply moved the unknown error from the wrench to the instrument on the bench.
Why the setting and technique affect the result
Even a correctly calibrated wrench can produce the wrong clamping force if we use it badly. Torque is only an indirect way of controlling bolt tension. Thread friction, under-head friction, surface condition, lubrication, corrosion, and thread damage all affect how much of the applied torque becomes useful clamp load.
This is why a fastener tightened dry should not automatically be tightened to the same value as one specified with lubricant. We follow the vehicle manufacturer’s procedure, including instructions about oil, threadlocker, washers, and whether the fastener is reusable.
The wrench itself also needs a fair working environment.
Keep the load straight
The applied force should be close to perpendicular to the wrench handle and directed smoothly. Pulling at an angle creates side loading and can make the reading less predictable. If we need to use a crowfoot or another extension, we must understand whether it changes the effective lever length.
A crowfoot attached at 90 degrees to the handle generally does not extend the torque arm in the same way as an in-line extension, but orientation and geometry still matter. An in-line adapter changes the effective length and can cause the fastener to receive more torque than the wrench setting suggests.
Do not use the torque wrench to break fasteners loose
A stuck fastener can exceed the wrench’s intended load before the mechanism has a chance to protect itself. The handle may bend, the spring may be overloaded, or the release mechanism may be damaged.
We use a breaker bar to loosen stubborn hardware. The torque wrench is for controlled final tightening, not for fighting corrosion.
Do not pull past the click
Once the wrench releases, stop. Continuing to pull after the click can add torque, especially if the mechanism has a short release movement or if we are working in a cramped position and cannot feel it clearly.
For a click-type tool, apply force gradually. Do not bounce the handle. Do not add a pipe to the grip. Do not assume that a harder pull makes the joint safer.
Read the scale carefully
Mechanical scales can be awkward, particularly in poor light or when the handle’s reference line sits between markings. A setting error of one graduation may matter on a small fastener. Before applying load, look directly at the scale and confirm the selected unit—newton-metres, pound-feet, or another marking.
The wrench should be set in the unit used by the service information. Converting between units is possible, but every conversion creates another opportunity to move a decimal point or confuse pound-feet with pound-inches.
The wrench controls the applied torque; it does not cancel friction, damaged threads, or a wrong service specification.
Choosing the right calibration approach for the repair
Not every job deserves the same level of measurement control, but we should be honest about where the boundary lies.
For routine work on a healthy vehicle, a correctly ranged wrench that has been stored properly and periodically verified may be adequate. That can include many general maintenance tasks where the manufacturer gives a conventional torque value and the joint is not unusually sensitive.
For critical work, the consequences of uncertainty rise quickly. Examples include:
- Cylinder-head and main-bearing fasteners
- Brake caliper and suspension attachment points
- Wheel fasteners, especially after a tool has been dropped
- Aluminum engine or transmission housings
- Spark plugs in soft or easily damaged threads
- Fasteners using a torque-plus-angle procedure
- One-time-use or torque-to-yield fasteners
- Repairs where the manufacturer specifies a narrow torque sequence
Torque-plus-angle procedures deserve a separate note. The initial torque value is applied with a torque wrench, but the final tightening is controlled by an angular rotation. A calibrated wrench does not replace the angle measurement, and reaching the initial torque does not mean the complete procedure is finished.
Likewise, calibration cannot tell us whether a bolt should be replaced, whether a thread is damaged, or whether the mating surfaces are clean. It only tells us how the tool behaves as a measuring instrument.
Mechanical click wrench or digital torque tool?
Digital tools can make small readings easier to see and may provide a stated tolerance around ±1% to ±2%. They can also offer audible or visual alerts, which is useful when the work area is dark or the fastener is hidden behind a suspension component.
Mechanical click wrenches remain popular because they are simple, durable, and do not need batteries. A typical mechanical tool may have a stated tolerance around ±4%. That is not automatically inadequate; it simply needs to be matched to the job and maintained accordingly.
| Feature | Mechanical click wrench | Digital torque tool |
|---|---|---|
| Feedback | Mechanical release and click | Display, alert, or vibration depending on model |
| Typical stated accuracy | Often around ±4% | Commonly around ±1% to ±2% |
| Storage | Return to minimum scale setting | Follow battery and electronic storage instructions |
| Main risks | Spring tension, mechanism wear, scale-reading errors | Sensor drift, battery issues, impact, electronic failure |
| Home verification | Weight-and-distance test is possible | Requires checking the display and measuring system together |
| Best advantage | Straightforward operation and no battery dependence | Clear readout and easier monitoring of small changes |
The important phrase is stated accuracy. We should not use a digital wrench as a reason to skip verification, and we should not dismiss a mechanical wrench simply because it has a wider tolerance. The correct tool is the one whose range, condition, and accuracy fit the fastener in front of us.
Storage, handling, and the long-term wear we usually ignore
Most torque wrench problems begin before the wrench is needed. It is left in a damp toolbox, tossed into a drawer under heavy sockets, stored at a high setting, or borrowed as a substitute for a breaker bar. Then, months later, we ask it to control a fastener that cannot tolerate much error.
A better storage routine is not complicated:
- Wipe dirt and oil from the handle and adjustment mechanism.
- Return a click wrench to its minimum marked setting without forcing the adjuster.
- Store it in its case or where it cannot be struck by heavy tools.
- Keep it away from excessive heat and moisture.
- Avoid leaving a digital tool with a depleted battery if the manufacturer warns against it.
- Record the last calibration or verification date on the case.
- Mark any drop, overload, or unusual event instead of relying on memory.
If the tool has been dropped on concrete, overloaded beyond its maximum capacity, or exposed to extreme environmental conditions, calibration should happen immediately rather than at the next routine date.
A wrench can also become difficult to use before it becomes obviously inaccurate. A rough adjuster, inconsistent click, sticky release, damaged scale, or ratchet that changes behavior under load is enough reason to stop and investigate. Do not spray a random penetrating oil into the mechanism and call the problem solved. Chemical fixes cannot restore a bent component or correct a shifted calibration.
Some manufacturers allow user-serviceable adjustments; others require a service center. We should not disassemble the release mechanism unless the tool documentation specifically supports it. The spring and internal trigger parts may be under load, and an improvised repair can leave us with a tool that feels better but measures worse.
When a home test is enough—and when it is not
The phrase how to check torque wrench calibration at home often suggests that one simple test can settle the question. It cannot always do that.
A home check is useful when we need to screen a tool before ordinary work, compare its behavior over time, or identify a clear failure. It is especially valuable for catching a wrench that has drifted far outside its expected range.
Professional calibration is more appropriate when:
- The wrench is used for repeated or paid repair work.
- The tool is required for documented quality control.
- The repair involves a safety-critical or expensive component.
- The wrench has been dropped or overloaded.
- The home test results are inconsistent.
- The tool is near the bottom or top of its usable range.
- We need a calibration record rather than personal confidence.
Testing should cover the tool’s operating range, not just the one value we happen to use most often. ISO-style evaluation at 20%, 60%, and 100% of maximum scale capacity illustrates the reason: performance can change across the scale.
For the home mechanic, this usually leads to a practical two-tool strategy. Use a low-range wrench for small fasteners and a higher-range wrench for larger ones, rather than forcing a single oversized tool to do everything. That improves resolution, keeps the working point away from the least comfortable end of the scale, and makes a verification test more meaningful.
A working routine that protects both the tool and the vehicle
Before a repair, we can establish a short routine without turning the garage into a laboratory:
1. Confirm the vehicle’s torque specification, units, tightening sequence, and any lubrication or angle instructions.
2. Select a wrench whose target value sits comfortably within its working range.
3. Inspect the wrench for damage, a loose head, a damaged scale, or an inconsistent mechanism.
4. Check its storage and calibration history.
5. Verify the tool if the interval has expired or its handling history is uncertain.
6. Tighten with a smooth, controlled pull and stop at the first release.
7. Return the mechanical wrench to its minimum setting after the job.
8. Record unusual events, especially drops, overloads, and repeated use at the top of the range.
This is not bureaucracy. It is how we keep a small spring-loaded mechanism from becoming the weakest link in a repair that may contain hundreds of dollars in parts and many hours of labor.
The torque wrench calibration frequency for a home garage therefore has a clear answer, but not a single number detached from use. Twelve months or 5,000 cycles is the ISO-based baseline. Twelve to twenty-four months can be a reasonable interval for occasional home use when the tool is handled carefully. More frequent work calls for a shorter schedule, while any drop or overload calls for immediate attention.
The long-term wear is the part we cannot feel through the handle. Springs relax, mechanisms bind, scales become hard to read, and a click that once meant one thing gradually means something else. We do not need to panic over every old wrench, but we do need to stop treating age and familiarity as proof of accuracy.
A calibrated wrench will not repair damaged threads or compensate for friction. It will not replace the service manual, the correct tightening sequence, or a sound fastener. What it gives us is narrower and more useful: a measured starting point. We protect that starting point by using the right range, storing the tool without spring tension, verifying it on schedule, and sending it out for professional calibration when the repair or the tool’s history demands more certainty.