Why Are Your Front Tires Wearing on the Inside?
Inner tire wear causes on the front axle are usually geometric, not cosmetic: the wheel is no longer presenting the tread evenly to the road.
Merritt Vane·Updated: August 19, 2026·15 min read
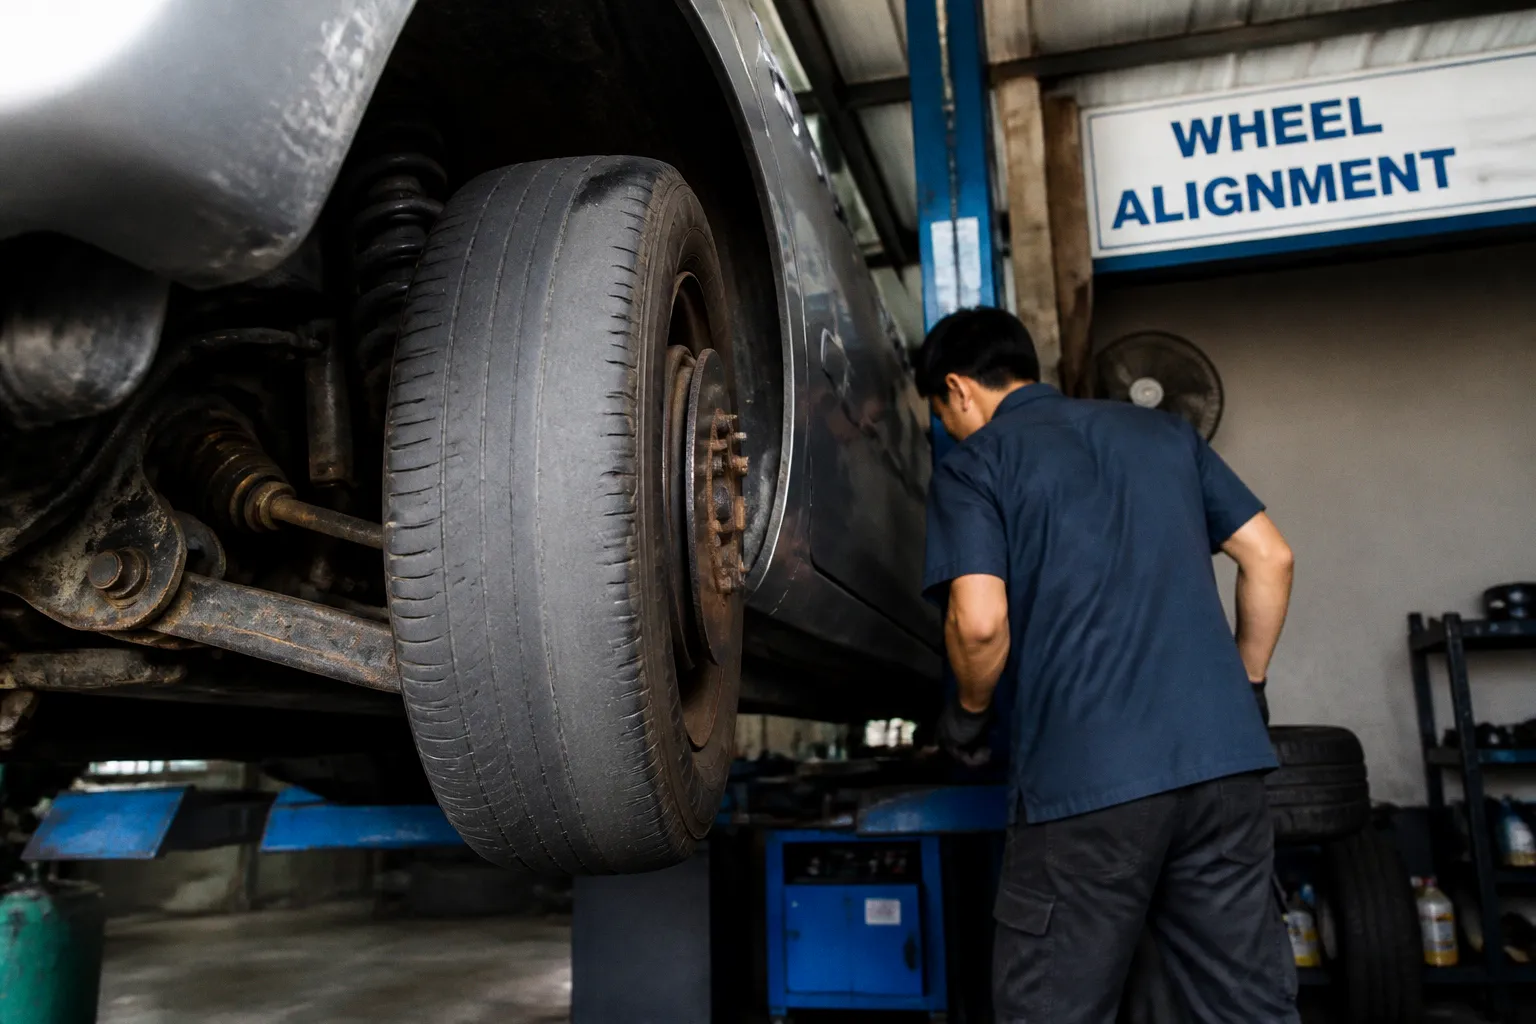
Excessive negative camber loads the inboard shoulder; toe-out makes the tire scrub laterally across the pavement; worn suspension components allow both angles to change while the vehicle is moving. The result is often a tire that appears serviceable from the outside but has already lost substantial tread along its inner edge.
This pattern is easy to miss because the damaged section faces the vehicle. A visual inspection made with the wheels pointing straight ahead may show nothing abnormal; the decisive evidence is often found only by turning the steering to full lock and examining the inboard ribs by hand. The rubber may feel feathered, stepped, or sharply reduced in depth long before the wear becomes obvious from the driver’s position.
The correct diagnosis is therefore not simply “the car needs an alignment.” Alignment describes wheel geometry; it does not restore a loose tie rod end, a deteriorated control arm bushing, or a ball joint that permits the hub to move under braking and cornering. The mechanical cause must be identified before the angles are measured and adjusted.
The mechanics of negative camber and inner edge wear
Camber is the inward or outward inclination of the wheel when viewed from the front of the vehicle. With negative camber, the top of the tire tilts toward the vehicle centerline. A modest amount may be intentional; many suspension designs use carefully specified camber to control tire loading during cornering. The problem begins when the angle exceeds the vehicle’s permitted range, or when it differs significantly between the two sides.
A tire is designed to distribute its contact patch across the tread width. Excessive negative camber changes that distribution; the inner shoulder carries a disproportionate share of the vertical load, while the outer portion contributes less than the tread design assumes. The microscopic contact between rubber and asphalt then becomes concentrated over a narrower band. Each revolution removes a small quantity of rubber from the overloaded shoulder through friction, deformation, and heat.
No single trip necessarily produces a visible change. The damage accumulates through thousands of load cycles, especially when the vehicle frequently encounters corners, uneven pavement, or heavy braking. Because the inner shoulder is shielded from casual inspection, the deterioration may remain unnoticed until the tread is close to the wear bars or the steel belt becomes exposed.
Camber wear symptoms
Negative-camber wear generally presents as a relatively smooth reduction of the inner tread shoulder. It may be most pronounced on the inner rib, progressing outward across adjacent blocks. The pattern does not always appear perfectly uniform; road crown, cornering habits, suspension asymmetry, and previous impacts can make one front tire substantially worse than the other.
Useful observations include:
- The inner edge is visibly lower than the center or outer shoulder when the tire is turned outward.
- The wear follows the circumference of the tire rather than appearing as isolated patches.
- The steering wheel may remain centered, even though the tire is being loaded incorrectly.
- The vehicle may not pull strongly to either side; excessive camber can damage the tread without producing an obvious directional complaint.
- The inner shoulder may feel hotter or more abraded after driving, although temperature by hand is not a substitute for measurement.
The distinction between normal and excessive negative camber cannot be made reliably by sight alone. Camber and toe are measured in fractions of a degree or in millimeters, depending on the alignment equipment and the vehicle manufacturer’s specification. A wheel that looks only slightly tilted may still be outside the usable range; conversely, a visible inclination may be part of the suspension’s intended design.
Inner-edge wear is not a surface defect to be polished away; it is a record of how the wheel has been loading the road.
Negative camber can result from a bent suspension arm, a displaced subframe, a damaged strut, incorrect ride height, or a component that has shifted after an impact. On some vehicles, a control arm bushing deteriorates without producing a dramatic visual failure; its internal elastomer may still be attached while allowing the arm to move farther than intended under braking and cornering. The alignment reading may therefore change dynamically, even if the vehicle appears acceptable while stationary.
How toe-out creates feathered inner tread
Toe describes the direction in which the wheels point when viewed from above. With toe-out, the front edges of the two front tires point away from one another. The vehicle may still travel forward, but each tire is angled slightly away from its preferred path; the tread must then slide and deform against the road to maintain contact.
This is a different mechanism from simple camber loading. Negative camber concentrates force on the inner shoulder; toe-out introduces lateral scrub across the tread. The two conditions often coexist, and their effects can reinforce one another. The inner portion of the tread receives the greatest load while also being dragged sideways, accelerating the loss of rubber.
The characteristic symptom is feathering. Run your hand lightly across the tread blocks from the inner shoulder toward the outer shoulder, then reverse direction. A properly even tread should feel comparatively consistent. With toe-related wear, the blocks develop a sawtooth profile; one edge feels raised while the opposite edge feels worn. The pattern can extend across the inner ribs and may be more informative than the visual appearance.
What feathered wear tells you
Feathering is commonly associated with toe misalignment, but it should not be interpreted as proof that adjustment alone will solve the problem. A tie rod end with excessive play can create a toe condition that changes under load. The alignment rack may show a value within specification when the vehicle is at rest, while the wheel shifts outward or inward during acceleration, braking, or cornering.
The practical diagnostic sequence is to examine:
1. The direction of the feathering. A consistent sawtooth pattern across the inner tread suggests the tire has been dragged laterally rather than merely loaded on one shoulder.
2. The amount of free play in the steering linkage. Tie rod ends and inner tie rods must be checked for movement while the steering is loaded appropriately.
3. The relationship between the two front tires. Similar wear on both sides often points toward a shared geometry problem; a sharply different pattern may indicate a localized impact or a single worn component.
4. The tread depth across several positions. Measuring only the outer groove can conceal the actual condition of the inboard shoulder.
5. The alignment readings before adjustment. A significant toe error is useful evidence, but it does not identify whether the cause is adjustment, impact damage, or looseness in the linkage.
Toe is particularly destructive because the tire does not merely carry an uneven vertical load; it is continually forced to negotiate a path that conflicts with the direction of travel. The rubber surface shears against the pavement, generating heat and a repeating pattern of abrasion. On a vehicle with worn components, that geometry can become unstable, producing wear that returns soon after a nominal alignment.
Worn suspension components that alter wheel geometry
The most persistent inner edge tire wear is often produced by a mechanical fault rather than by a forgotten alignment adjustment. Steering and suspension components define the position of the hub; when their joints or bushings lose stiffness, the wheel is no longer held at a fixed angle under changing loads.
The components most relevant to this pattern include:
- Outer and inner tie rod ends. Wear allows the steering knuckle to move relative to the steering rack, changing toe as the vehicle brakes, accelerates, or turns.
- Ball joints. Excessive play can alter camber and toe; in severe cases, the joint becomes a safety-critical failure point rather than merely a source of uneven tire wear.
- Control arm bushings. Cracked, separated, or softened elastomer permits the control arm to shift longitudinally or laterally. The resulting geometry change may be greatest during braking and cornering.
- Strut assemblies and upper mounts. A bent strut, damaged mount, or degraded bearing can change camber, steering movement, and the wheel’s return behavior.
- Wheel bearings. Excessive bearing play allows the hub to move, complicating alignment readings and producing irregular contact between the tire and road.
- Bent knuckles, control arms, or subframes. A pothole or collision can permanently alter the suspension’s reference geometry even when no component is visibly fractured.
The terms “worn suspension tire wear” and “bad alignment tire wear patterns” are sometimes treated as separate diagnostic categories; in practice, they frequently overlap. Alignment is a static measurement of relationships between wheels and the vehicle body. Suspension wear is a loss of control over those relationships. If the wheel moves after the measurement has been taken, the printed alignment result describes only one moment.
Distinguishing suspension wear from a simple alignment error
A technician should not begin by adjusting toe and sending the vehicle away. The wheel must first be checked for looseness, deformation, abnormal bearing movement, and incorrect ride height. A suspension component that has shifted or failed can make the adjustment impossible, unstable, or misleading.
Several accompanying signs strengthen the case for a mechanical inspection:
- The vehicle wanders or requires continuous steering correction.
- The steering wheel changes position after braking or after striking an uneven surface.
- A clunk appears when moving from braking to acceleration or when crossing a sharp pavement edge.
- The tire has diagonal patches, cupping, or scalloped depressions rather than only a smooth inner-shoulder loss.
- The alignment cannot be brought within specification, or the readings change when the vehicle is rolled and measured again.
- One wheel appears to sit farther rearward or forward in the arch than its counterpart.
Cupping and diagonal patch wear deserve particular attention. They may indicate inadequate damping from a worn shock absorber or strut, a wheel imbalance, or another condition that repeatedly unloads and reloads sections of tread. This is not the same pattern as pure camber wear, although multiple faults can coexist. A tire can have a smooth inner shoulder loss from negative camber and separate patch wear caused by poor damping.
Why the repair sequence matters
The correct order is straightforward, but reversing it is common:
1. Inspect the tires and document the wear. Record tread depth at the inner, center, and outer portions; note feathering, cupping, exposed cords, cuts, and differences between sides.
2. Inspect steering and suspension components. Check tie rod ends, ball joints, control arm bushings, strut mounts, wheel bearings, and any part that may have been bent by an impact.
3. Replace damaged or worn components. The replacement must restore the mechanical stiffness and position required by the suspension design.
4. Verify ride height and wheel installation. Incorrect springs, collapsed components, damaged wheels, or improperly seated parts can distort the alignment process.
5. Perform a professional four-wheel alignment. The final adjustment should follow the vehicle manufacturer’s specifications, not a generic target chosen for convenience.
6. Recheck the tire condition and steering position. Alignment correction prevents further geometric abuse; it does not recover tread that has already been removed.
An alignment can correct an angle; it cannot repair the joint or bushing that allows that angle to move.
A four-wheel alignment is especially relevant on vehicles with an adjustable rear axle or a rear thrust angle that influences the vehicle’s path. Even when the visible damage is on the front tires, the rear geometry can affect steering correction and the way the front axle tracks the road. The precise procedure varies by platform; imported vehicles may use different adjustment points, eccentric bolts, shims, or non-adjustable factory geometry. If the required value cannot be reached, the technician should investigate the reason rather than compensating indefinitely at another adjustment point.
Replacing only the tires is not a repair. New tires may temporarily conceal the pattern because their tread begins at full depth, but the same force distribution remains present. Likewise, rotating the tires can move the evidence to another axle without removing the cause; some directional or staggered tire configurations do not permit rotation at all, and a badly worn tire should not be treated as an interchangeable diagnostic component.
Tire inflation requires the same precision. Underinflation can increase shoulder loading, but overinflation typically produces greater wear at the center of the tread rather than at both edges. It is therefore incorrect to assign every uneven pattern to pressure. Use the pressure specified for the vehicle and load condition, then interpret the wear in combination with geometry and mechanical inspection.
How to inspect the hidden inboard tread
Because inside edge tire wear is concealed by the body and steering components, inspection must be deliberate. Do not rely on viewing the tires while the vehicle is parked with the wheels straight. Turn the steering to full lock where safe and practical, or use a suitable inspection method that exposes the inner shoulder without placing any part of the body beneath an unsupported vehicle.
Move across the entire tread width rather than examining the outer blocks alone. Look for:
- A continuous reduction in depth at the inner shoulder, consistent with excessive negative camber.
- A sawtooth or feathered surface, associated with toe-out or another toe error.
- Repeating cups or diagonal depressions, which may point toward damping, balance, or wheel-related problems.
- Localized damage after a pothole or curb impact.
- Cracks, bulges, exposed cords, or a sharp transition between intact and severely worn tread.
Use a tread-depth gauge at several positions around the circumference. The purpose is not to produce an impressive number; it is to reveal the shape of the wear. A single measurement in the center groove can make a compromised tire appear acceptable. Inner-shoulder damage may be advanced even when the center still shows usable depth.
The inspection should also include the condition of the tire’s inner sidewall. A tire that has been driven with a severely degraded shoulder may have experienced additional heat and structural stress. If cords are visible, if the rubber is cut, or if the wear has reached the wear indicators, continued service is not appropriate. No alignment adjustment can restore the load-bearing structure of a damaged tire.
A practical pattern-reading table
| Wear pattern | Likely mechanism | What it requires |
|---|---|---|
| Smooth wear concentrated on the inner shoulder | Excessive negative camber; may be caused by incorrect geometry or worn parts | Suspension inspection followed by professional alignment |
| Feathered inner tread blocks | Toe-out or toe that changes under load | Steering-linkage inspection and toe measurement |
| Cupping or diagonal patches | Weak damping, wheel imbalance, or another rotating assembly issue | Inspection of struts, shocks, wheels, and balance |
| Localized wear after an impact | Bent wheel, knuckle, control arm, strut, or shifted subframe | Measurement and component inspection before alignment |
| Uneven wear with visible looseness | Ball joint, tie rod, bearing, or bushing failure | Mechanical repair before the vehicle is aligned |
This table is a diagnostic aid, not a substitute for measuring the suspension. Similar appearances can have different causes; the distinction depends on whether the wheel is held rigidly, whether the geometry remains stable under load, and whether the alignment values correspond to the manufacturer’s specification.
Preventing the pattern from returning
Prevention begins with observing the tread before the steering or handling complaint becomes severe. Inspect the inboard shoulders whenever the vehicle is serviced, after a substantial pothole impact, and whenever a tire is removed. The exact mileage at which inner wear appears cannot be predicted reliably; road surfaces, alignment history, suspension design, load, and driving conditions alter the rate considerably.
A disciplined maintenance approach includes:
- Checking tread across the full width, not only the visible outer shoulder.
- Confirming cold tire pressures against the vehicle’s specified values.
- Investigating new pulling, wandering, steering-wheel offset, or impact-related noise rather than correcting only the symptom.
- Replacing worn steering and suspension components before requesting alignment.
- Asking for the before-and-after alignment readings so that an adjustment can be distinguished from an unresolved mechanical limitation.
- Replacing tires that have reached structural damage or unsafe tread loss; do not place a compromised tire on another axle to postpone the decision.
The chemistry of the tire surface makes delay particularly unhelpful. Rubber exposed to repeated shear, heat, oxygen, and road contaminants does not simply lose a decorative layer; the tread profile changes, the stress distribution becomes less uniform, and the remaining material is asked to perform outside the condition for which it was engineered. Cleaning the tire may make the surface easier to inspect, but no pH-neutral product, dressing, or solvent can reverse geometric wear. A surface-preservation discipline begins with identifying the mechanical process that is removing the material.
The same principle applies to the suspension. Elastomeric bushings age through thermal cycling, ozone exposure, contamination, and repeated deformation; their failure is a change in mechanical behavior, not always a dramatic break visible from above. A component may therefore deserve replacement before it looks completely destroyed, particularly when alignment values are unstable or the tire pattern returns after adjustment.
The repair is geometric, not cosmetic
The most reliable explanation for front inner tire wear is a combination of wheel geometry and mechanical control. Excessive negative camber concentrates load on the inside edge; toe-out scrubs the tread and creates feathering; worn tie rod ends, ball joints, control arm bushings, strut assemblies, or bearings allow those angles to shift while the vehicle is in motion.
Begin with the tire pattern, but do not end there. Expose the hidden shoulder, measure tread across its width, inspect the steering and suspension for play, repair the underlying fault, and only then perform a professional four-wheel alignment. If the tire has already suffered severe shoulder loss or structural damage, replace it as part of the repair rather than treating alignment as a way to recover unusable rubber.
A vehicle whose wheels remain correctly located under load will preserve its tires far more effectively than one that merely produces acceptable alignment figures while stationary. Preventative maintenance is therefore strict and sequential: stable components first, verified geometry second, and regular inspection before the inner edge disappears from view.